

Hello there, my name is Ron Call from Urban Floor and today I want to talk about the three phases of flooring installation.
As a flooring professional, when I walk into someone’s home for the first time, just as a guest and not even as a professional, the first place my eyes go are straight to the floor. I can’t help myself; it’s what I do. I assume my dentist looks at people’s teeth when he meets them for the first time. It’s human nature, I guess. Whether the floor is carpet, wood, laminate or tile, I can in tell in seconds whether the installation was done by a professional or a weekend warrior. If it looks like it was done by a weekend warrior, I usually ask, “Who did your floors?” It is so obvious to me when a floor is installed by an amateur homeowner, because the devil is in the details. Most people will not tackle a carpet job on their own unless it’s a drop room or two. Seams are not easy to do if you don’t have the experience. A loose, wavy install that has not been power-stretched can be seen from miles away. Likewise on hard surface installations like wood, laminate, tile and vinyl, properly installed baseboards, moldings and undercut door jambs are the difference between a million-dollar install and the headache of callbacks, repairs and an unhappy customer.
The Three Phases of Taite Floor Installation
Phase 1
There are basically three phases to a flooring installation (phase one, floor prep, and phase three, the finishing details, are the most important). Phase one, floor prep, means making sure your substrate is clean, flat and dry. This is critical to any installation. For soft surfaces, making sure you have backed up or replaced any loose tack strip or old metals will make your carpet job smooth and relatively stress-free. There is nothing more frustrating when you are power-stretching carpet than to have popping tack strip.
For hard surface installations, not properly flattening, sealing and prepping your floor is usually the difference between being a pro anda weekend warrior. If while working on a floating install, you feel like you’re walking on a trampoline, then you probably left your 10’ straight edge at home. At this point you better stop what you’re doing, go home and get it. Pull up what you have done and fix it now, as fixing it later will take much more time and cost much more money.
Phase 2
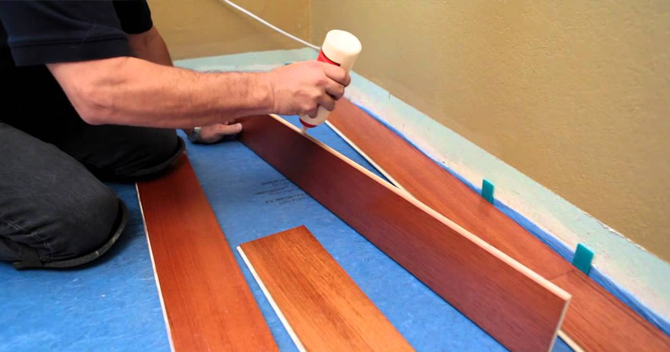
Phase two is the actual installation of the floor. Sure, it looks pretty easy when you watch them do it on the DIY channel, which is why so many homeowner’s attempt to do it themselves. How hard can it be, right? Well, what they don’t realize is when you are paying for a quality installation, you are really paying for an excellent job not just in phase two, the install, but phases one (floor prep) and phase three (finishing details).
Phase 3
Properly installed base boards, quarter round, base shoe, T-moldings, baby thresholds, scribe moldings and other trims (all part of phase three) will make the difference between a happy customer and a callback, and set you apart from the DIYers. If you really want to set yourself apart from other installers, learn to stain and finish your own trims. To really wow them, learn how to cut hard returns on baseboard and shoe moldings.
Just because the manufacturer and retailer sold a 3” wide baby threshold as a transition at the sliding glass door does not mean it will look as good as a small scribe molding that you stained to match. If you’re not comfortable staining your own scribe molding, you might be able to take the prefinished baby threshold provided and rip it on a table saw to create your own prefinished scribe molding. I installed a baby threshold at a sliding glass door once and my customer told me it looked like an aircraft carrier on his hardwood floor. Compared to a small scribe molding I could hardly disagree.
Dealing With Transitions

Transitions like T-moldings and reducers can be tricky, especially when working with a concrete subfloor where pin nailing them down is not an option. Most installers will use a good construction adhesive and blue painter’s tape to secure them in place while the adhesive cures. However, when installing multiple pieces (for example at a tile, carpet or stone transition where there are angles such as a fireplace or tile entryway) the installer often finds the next day, after the adhesive has cured, that the pieces have shifted and become misaligned. Or maybe there are gaps.
This often necessitates buying new moldings and starting over, as removal at this point almost always results in breakage. This is often caused by someone stepping on the moldings before the adhesive has had time to fully cure, or the trim piece was slightly bowed and lifted up off the floor and the tape could not hold it.
The Trick to Floor Transitions
A simple method to prevent this is to purchase a $20 hot-melt glue gun from your local hardware store. When applying your construction adhesive, leave a small area on both ends of each piece and a small spot in the middle of the channel where the glue is to be applied. This is where you will place dollops of thermal-plastic glue.
Apply the construction adhesive first; making sure your molding is cut properly. (Dry fit first.) Then quickly place the hot-melt glue in the three spots where there is no construction adhesive. Quickly place the molding in place and hold in securely for about three minutes while the thermalplastic glue sets up (cools).The thermalplastic glue will hold the molding in place until the construction adhesive has had time to cure. No need for blue tape on transitions any more. This method will also save a trip back the next day to do a carpet re-tack after the construction adhesive cures.
The hot-melt glue once cooled will hold the carpet reducer in place, allowing for a carpet re-tack before the construction adhesive fully cures. Using the hot-melt glue gun will save you hundreds of dollars a year on callbacks, blue tape, replacing shifted moldings and trip charges for re-tacks.
Be sure and carry plenty of colors of wood putty and caulking. Putty any gaps and nail holes, and caulk the tops of your baseboards and around toilets and at bathtubs. Undercut your door jambs and keep your blades sharp. Doing all this leads to happy customers, which leads to more customers.
The Devil is in the Details – Don’t Cut Corners
Remember – the devils in the details so don’t cut corners. Make yourself a master of phase one and phase three; most anyone can do phase two in a pinch. You are not getting paid just for mastering one of the phases. You are getting paid to be a master of all three.