


I’ve daydreamed about buying a backyard movie set-up (projector, screen, etc) for several summers now. But the logistics and potential expense always stopped me… until last month!
And now I feel silly for waiting, because we pulled it off with just 3 pieces of equipment that cost less than $200 total. That’s cheaper than the cost of some projectors alone… or a few family trips to the movie theater.
In addition to not spending a lot, we also wanted equipment that would be easy to set up. So in this post we’ll cover:
- The 3 items we purchased (one is optional!)
- How to set up your outdoor movie night
- Tips we learned along the way
Equipment For An Outdoor Movie Night
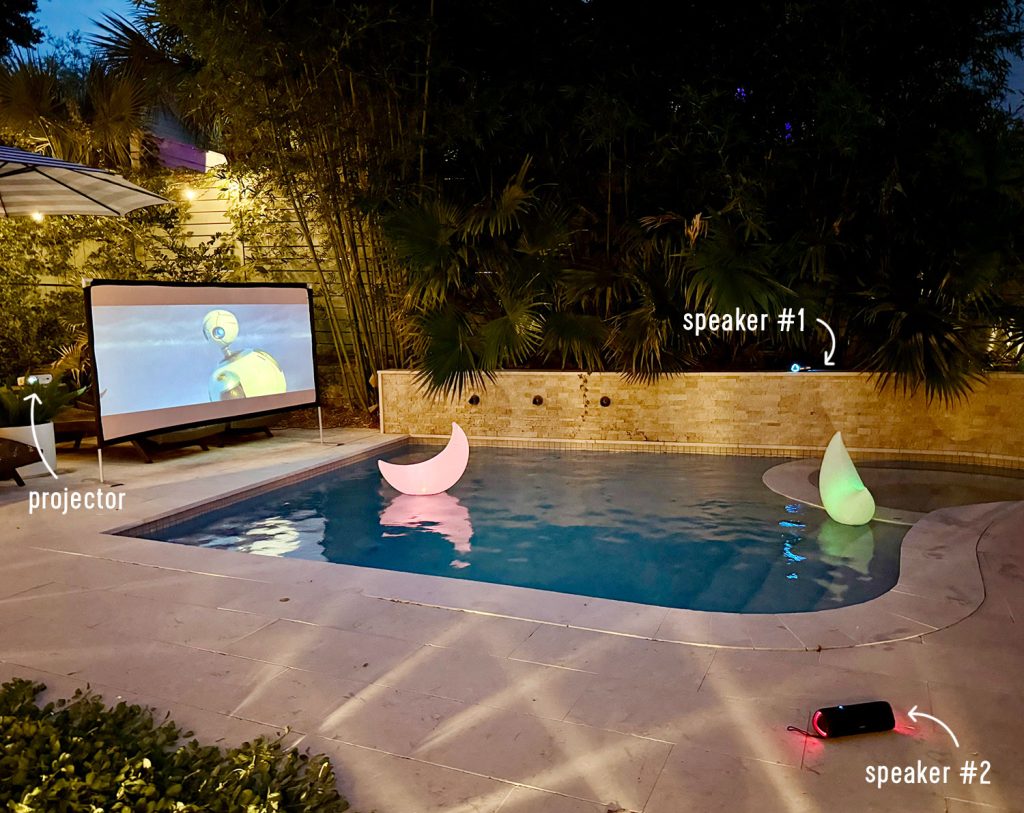
Here are the 3 pieces of equipment we purchased – and how much we paid! – to set-up an outdoor cinema in our backyard:
- Smart Projector ($99)
- Collapsible Outdoor Movie Screen ($39)
- Bluetooth Speakers ($46 for 2)*

*The speakers are optional because the projector has built-in speakers. However, connecting portable speakers will give you more flexibility over your setup, including creating a “surround sound” effect.
You can watch how fast it is to set everything up in this time-lapse video we filmed the other night. I had the screen assembled in less than 3 minutes! Don’t worry, we still sped it up for you…
Note: You can also watch this video on YouTube
1. Smart Projector
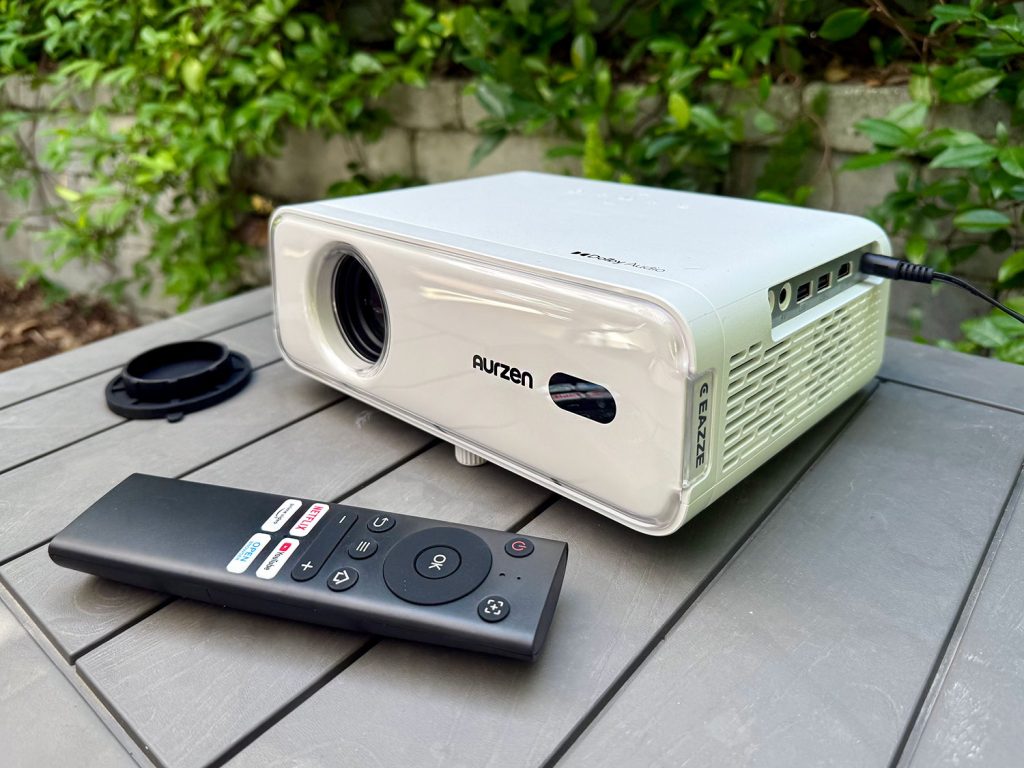
We chose the Aurzen EAZZE D1 Smart Projector, which was marked down from $149 to $99 when we purchased it. I came across cheaper and pricier options in my research, and landed on this middle-ground option for a few reasons:
- It’s WiFi-enabled, meaning it can stream services like Netflix without having to connect other cords or devices.
- It’s Bluetooth-enabled, allowing you to enhance your audio experience with external speakers.
- It auto-adjusts the picture, meaning things like focus and keystoning (when the image looks skewed) are adjusted for you. You can manually adjust them as well.
- It can project from in front OR behind the screen, which gives you more placement options.
These 4 features were important because I wanted the setup to be flexible, low-stress, and not involve a lot of extra cords. And overall, we’re EXTREMELY PLEASED with this purchase. There are some minor drawbacks (which I’ll share in the “tips” section) but they’d be issues with any projector, and they’re easy to overcome.
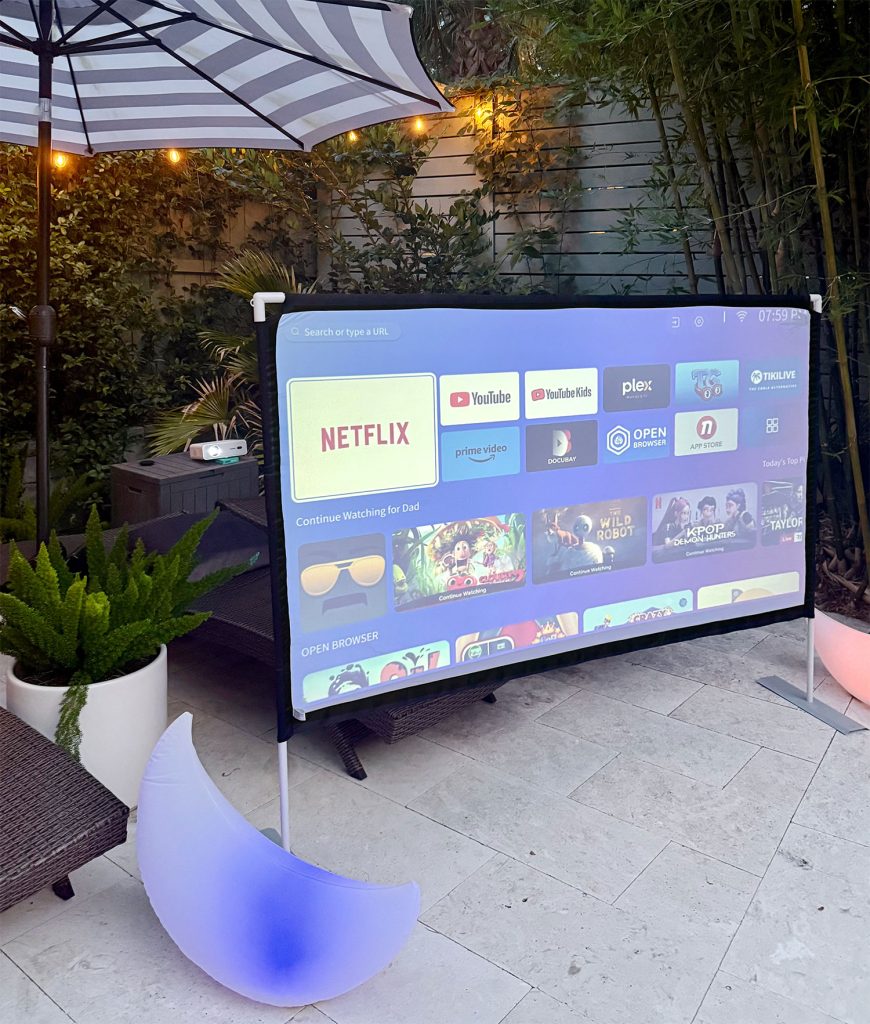
2. Collapsible Outdoor Movie Screen
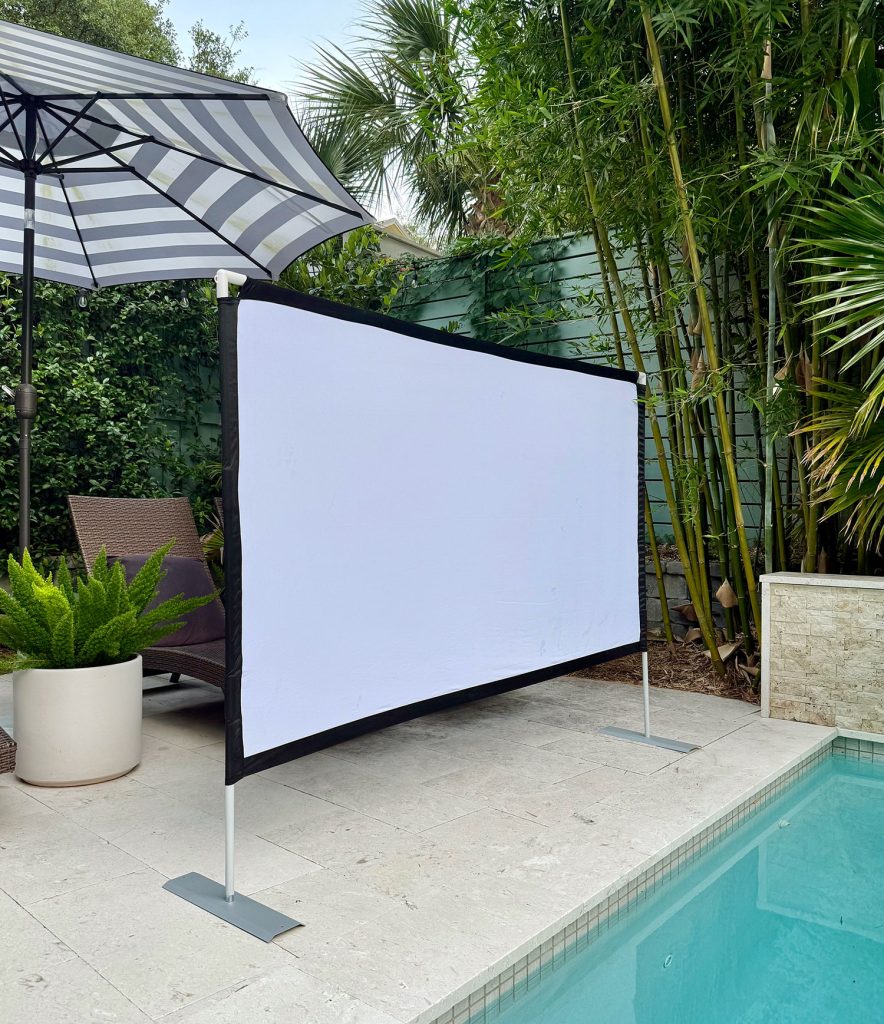
We considered a DIY screen made from PVC and a bed sheet or drop cloth, but decided to “splurge” on this $39 outdoor projector screen instead. We chose the 80″ size (measured diagonally), but it also comes in 100″, 120″, and 150″ versions. Depending on sales, the larger versions are sometimes cheaper! So just go with what you think will fit your space the best.
We chose this type of screen because:
- It’s freestanding, so no need to put hooks or holes in your house
- It’s straightforward to assemble
- It fits into a zippered storage case when collapsed (see below)
- It also comes with ground stakes, water bags, and tie-down cords to help anchor it in place. We haven’t needed any of these yet.
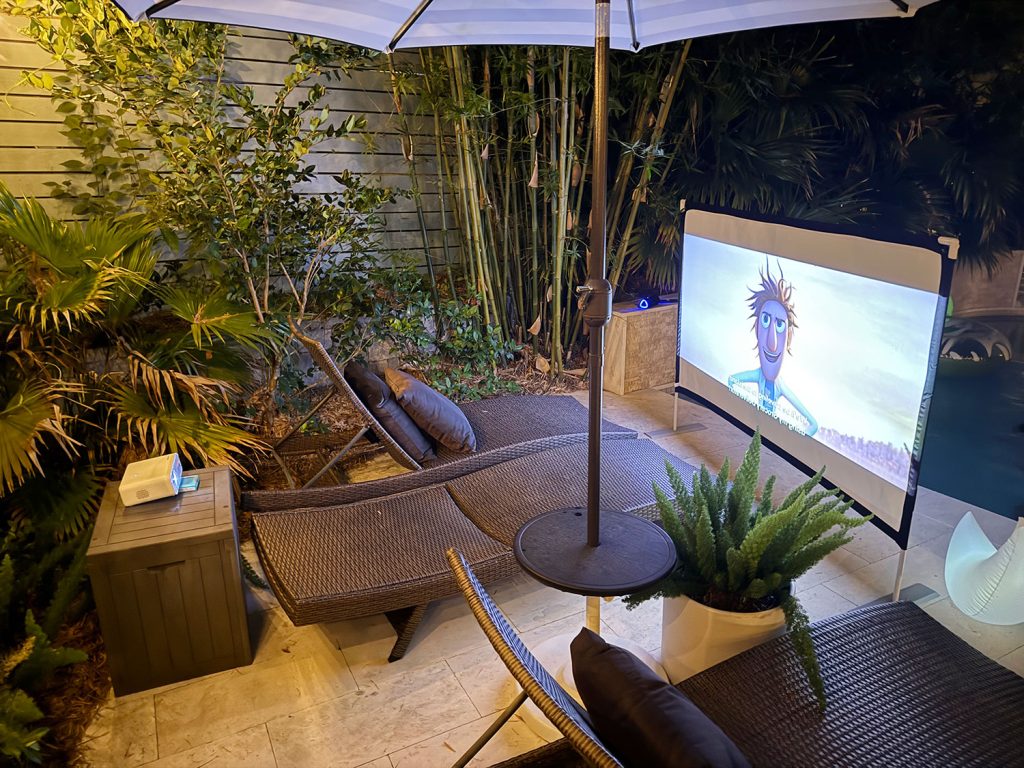
We had a few ideas about where we’d set everything up in our yard, and none involved projecting onto a wall or surface where we could hang something. So having a freestanding screen on a stand allowed us to easily test out a couple of arrangements.
Plus, when the summer months pass, we love the option of positioning the screen around the firepit instead of the pool. I’m already excited about cozy movies with blankets and a roaring fire!
3. Bluetooth Speakers
After our first few nights using the built-in speaker on the projector, we decided to buy two of these budget-friendly Bluetooth speakers ($23 each at the time). The built-in speaker wasn’t bad. In fact, it was quite loud (and easily adjustable) – so these are definitely not required.
Why’d we buy them then? Keeping the projector within earshot of the pool meant a greater risk of it getting splashed, walked into, or stood in front of. So switching to wateproof Bluetooth speakers allows us to place the projector out of the way, while not sacrificing our ability to hear the movie.
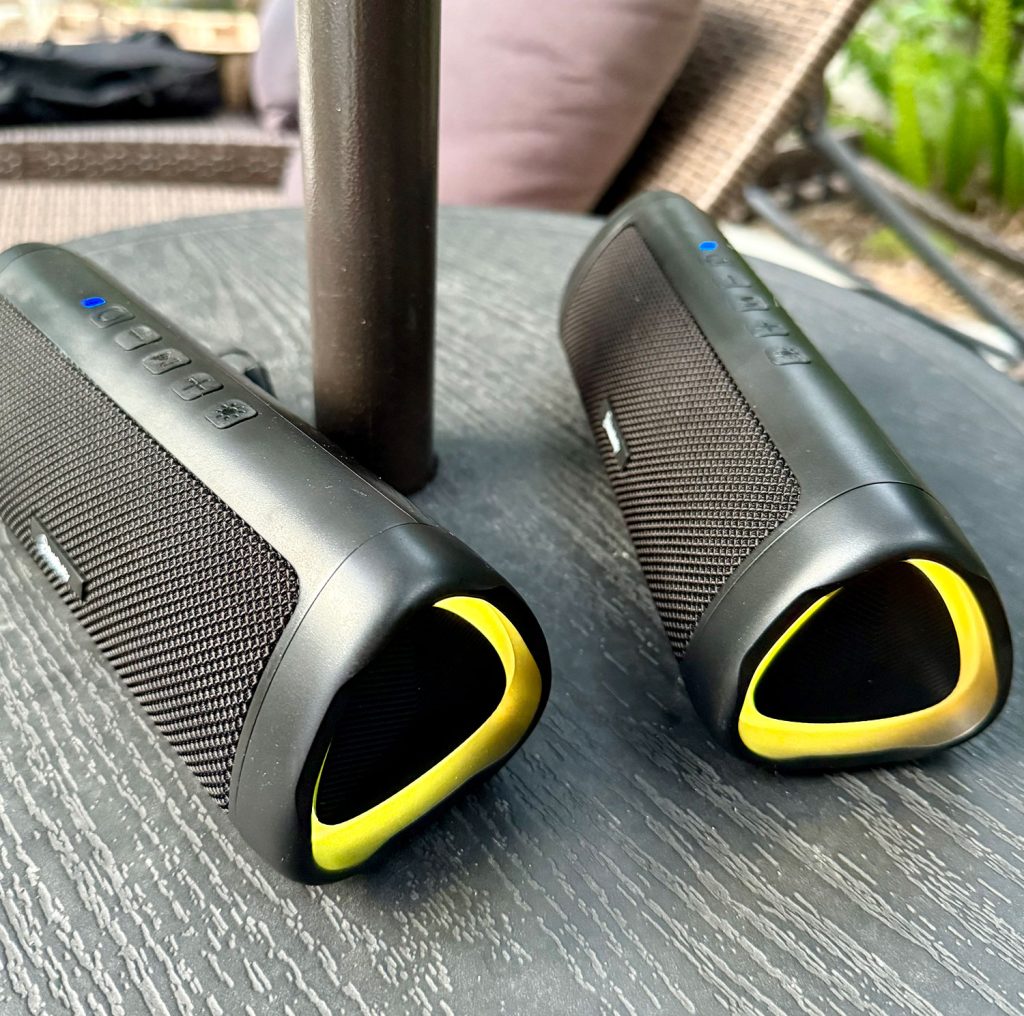
We chose these specific speakers because they can pair with each other, meaning we can create a surround sound experience (without spending big money on a Sonos system or another more pricey option). They also give us lots of placement flexibility depending where we are and what we’re doing. For example, we could move one next to the hot tub or even by the firepit if some people are staying dry that night.
One thing to note is that connecting Bluetooth speakers disables the projector’s built-in speakers, so don’t expect it to be a third sound source in this set-up. Two speakers has been plenty of us, so that’s just a heads up!
Setting Up A Backyard Movie Night
Our goal was to keep the setup process easy and painless, because we knew anything complicated would discourage us from actually using it. So here’s a quick rundown of what we do:
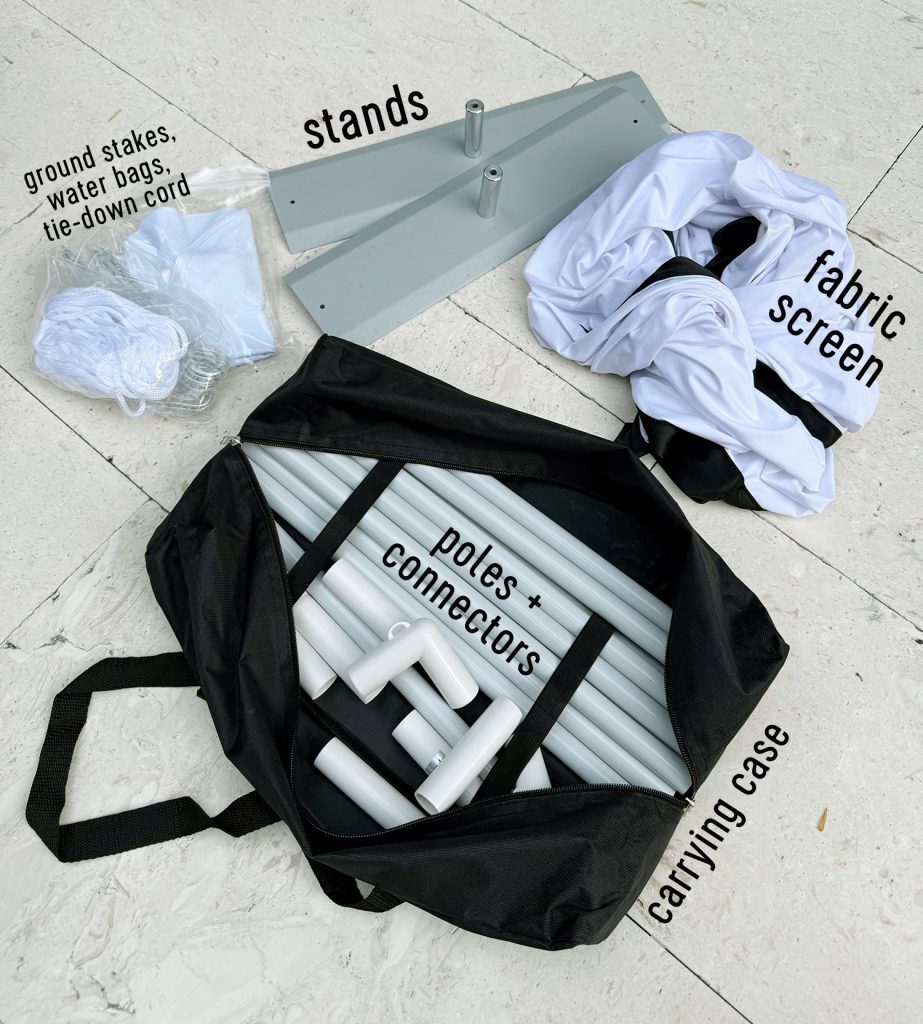
Step 1: Assemble The Movie Screen
First, you want to set-up your screen. That way you’ll have your projection surface ready when it comes time to adjust the picture on the projector.
Screen assembly takes less than 5 minutes. It’s kind of like putting up a tent – only much easier! The frame is made from PVC pipes that pop together with the provided connectors. Slide each section through the fabric sleeves on the edges of the screen, connect the corners, and set it onto the metal stands. That’s it.
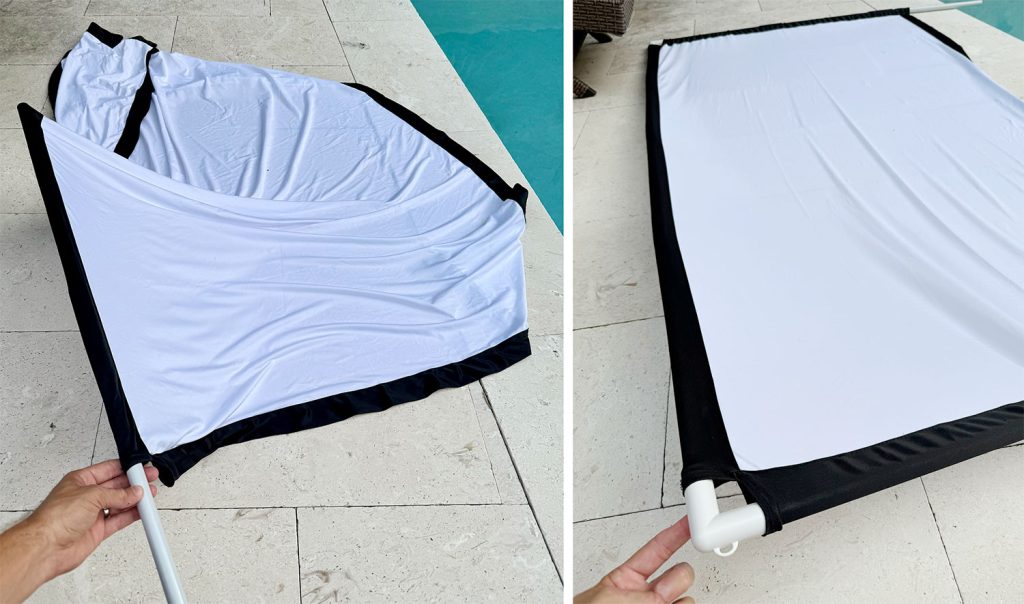
We left off one section of PVC on each vertical side so that our screen sits closer to the pool level. That’s why ours looks shorter than what’s pictured online. We found that to be the more comfortable viewing from in the pool.
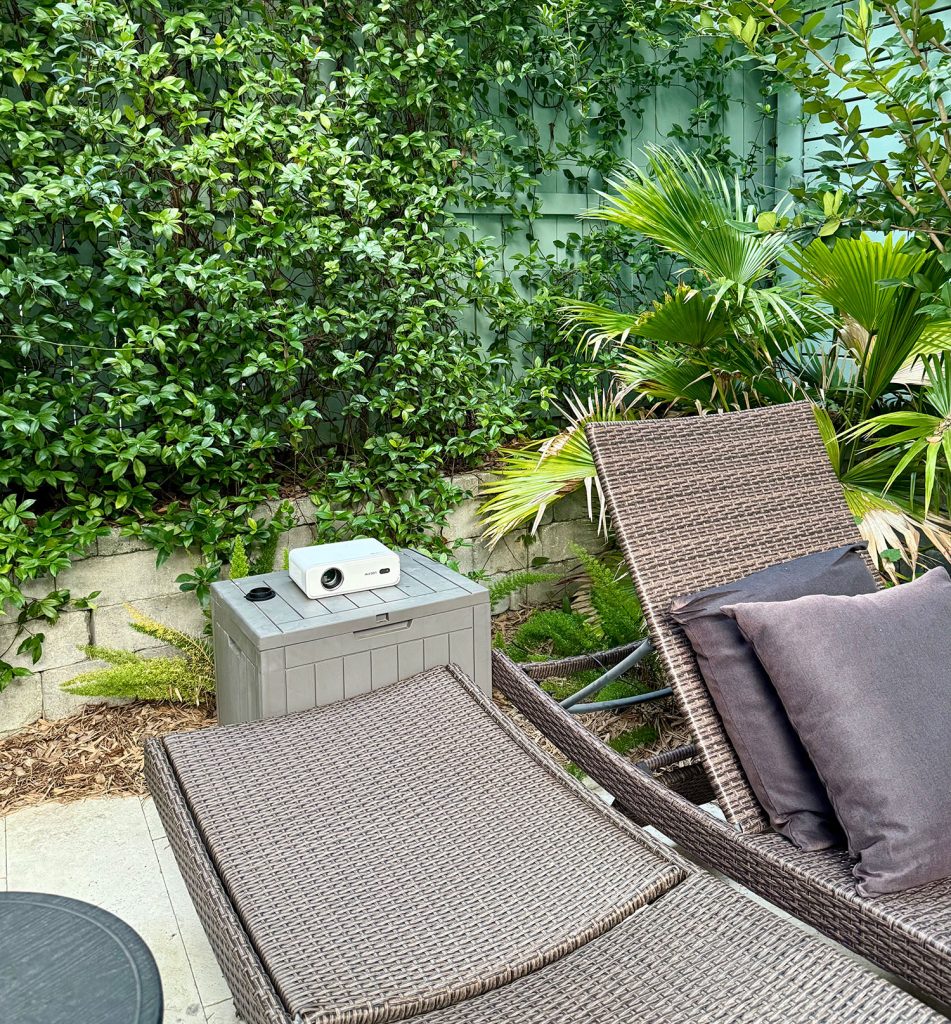
Step 2: Position & Power Up Your Projector
Next, find a good spot for your projector. This may be straightforward for some, and more challenging for others. But here are some things to keep in mind:
- Know your power source (we use an extension cord plugged into an exterior outlet).
- Make sure your cords don’t become tripping hazards in the dark.
- Place the projector on an elevated, flat surface, like a side table or sturdy box (we temporarily move our pool toy storage box).
- There is an adjustable foot under the front of projector, but you may also need a book or other object to angle it to the right height.
- Consider projecting from behind your screen to minimize obstructions & hazards.
- Your projector does NOT need to be exactly straight on, thanks to keystone correction in the settings. This is EXTREMELY HELPFUL!
Once it’s generally in the right spot, turn on your projector so you can calibrate everything more precisely.
Step 3: Adjust Your Picture
The projector we bought automatically adjusts focus and keystone as soon as it turns on. You can reset or fine-tune these later if needed, but we found this feature to be very helpful! It works better when it’s dark enough outside, so you may need to be patient.
If the projector does not take you to a set-up menu, you can access it in the top corner of the home screen. Here’s where you can find important settings like:
- Wifi Connection
- Bluetooth Pairing
- Zoom
- Front or Rear Projection (rear projection will mirror the image)
- Keystone (manual adjustments OR redo the auto-adjustments)
- Focus (manual OR auto)
The projector comes with a standard remote control to navigate. Also, any time the projector detects that you’ve shifted its placement, it will redo the auto-focus and auto-keystone. My only complaint is that when that happens, it undoes any manual settings (like zoom).
Step 4: Connect Your Speakers
This step isn’t necessary if you’re using the projector’s built-in speakers. But if you’re connecting a Bluetooth speaker – like the pair we bought – you’ll need to connect them to the projector from the Settings menu.

With these specific speakers, you’ll need to pair them to each other before pairing them to the projector. That’s how you’ll be able to achieve a “surround sound” style by placing each speaker on opposite sides of the viewing area.
Step 5: Stream Your Movie
Because of the projector’s built-in Wifi, you can easily sign into your Netflix, YouTube, or Prime Video accounts and stream directly from the projector.
However, if you want to stream from other services like HBO Max, Hulu, Disney+, etc, you’ll need to connect a separate device (like your phone, laptop, Roku or Fire TV stick). This is due to licensing restrictions, and the projector manufacturer only has authorization for Netflix, YouTube, and Prime Video. The projector has 2 USB ports and 1 HDMI port.

The projector comes with a short HDMI cable, so you can use something like this $10 adapter cord to connect a laptop. You also may be able to screen mirror some videos from your phone, but we didn’t have luck with that.
Step 6: Enjoy!
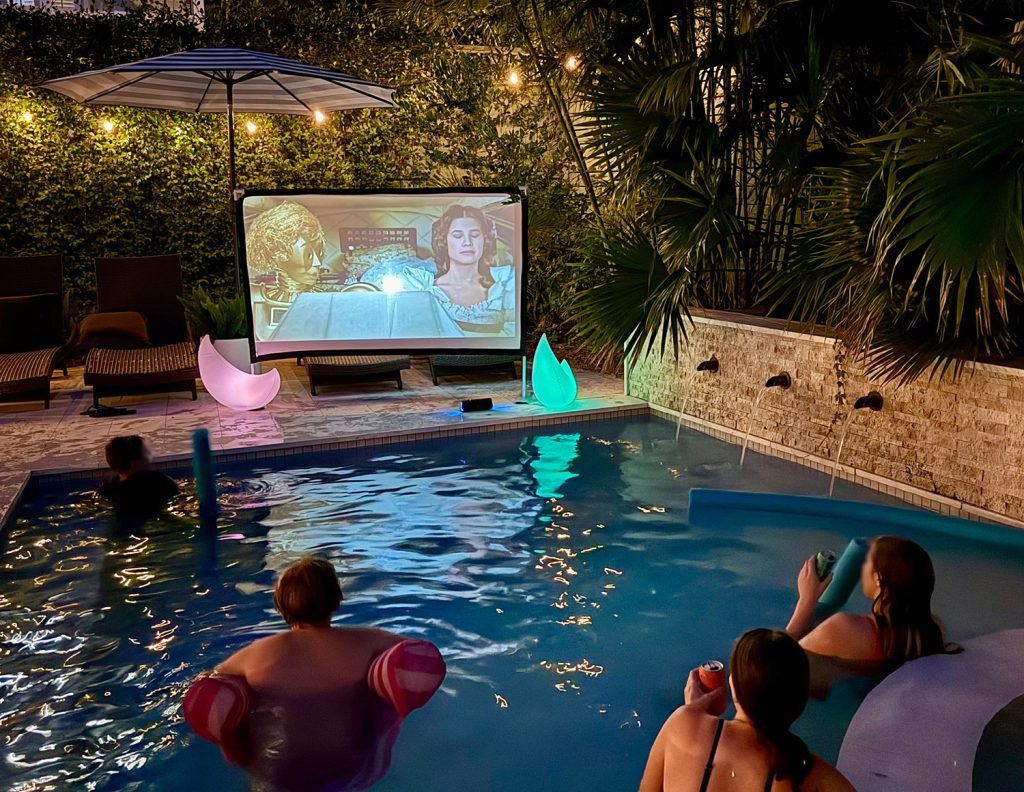
Grab your chairs, floats, drinks, popcorn, or whatever else and enjoy!
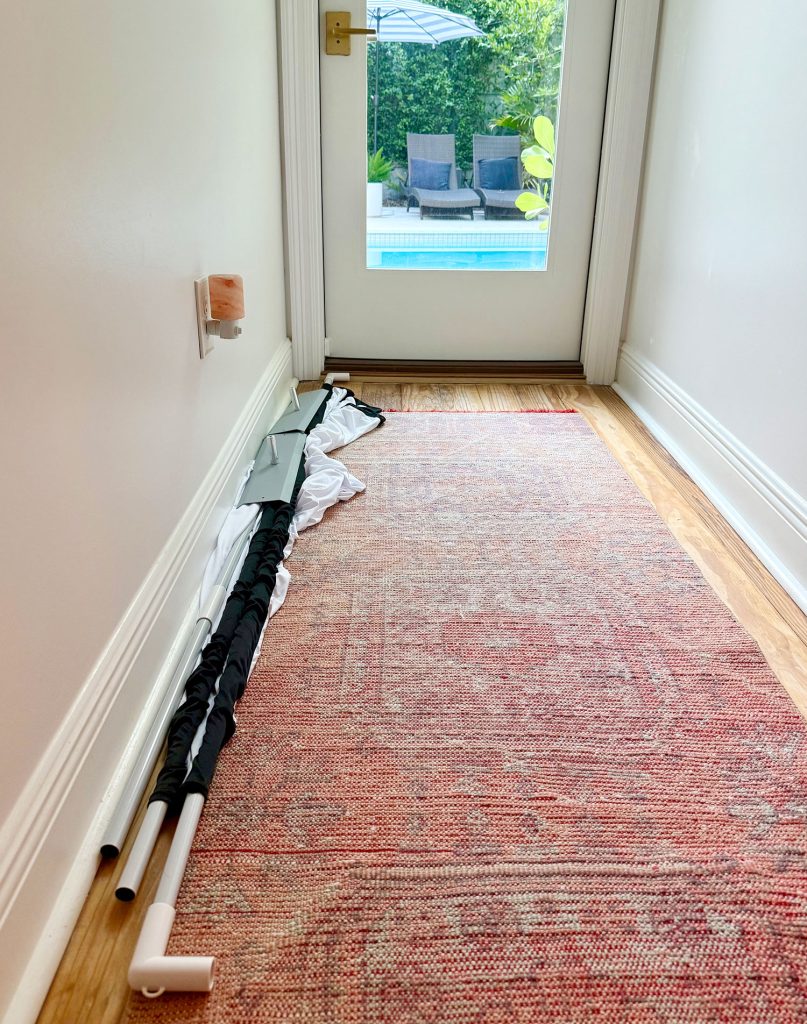
Step 7: Pack It Up!
Being able to break down quickly was another big must for us. Especially since we’re usually tired by the end of the evening (can’t start the movie until it’s dark, so movie nights often end pretty late!). But we also don’t want to leave stuff out overnight to get wet or dewy.
The projector is easy to put away – just turn off and unplug! Same with the speakers. The screen takes a little more time to disassemble and arrange back into the carrying pouch, so we often just pull the screen apart at the corners so it can be tossed inside for the night (shown below). Then in the morning we can carefully pack it away when we’re more awake!
It really does collapse down to be very small and easy to store. Everything fits nicely in my closet when not in use.
All in all, we’d say set-up takes around 15 minutes (depending on how much futzing you need to do with your picture) and less than 5 minutes to break down.
Helpful Tips / Things to Know
Here are a few things that we wish we knew upfront about this outdoor movie set-up.
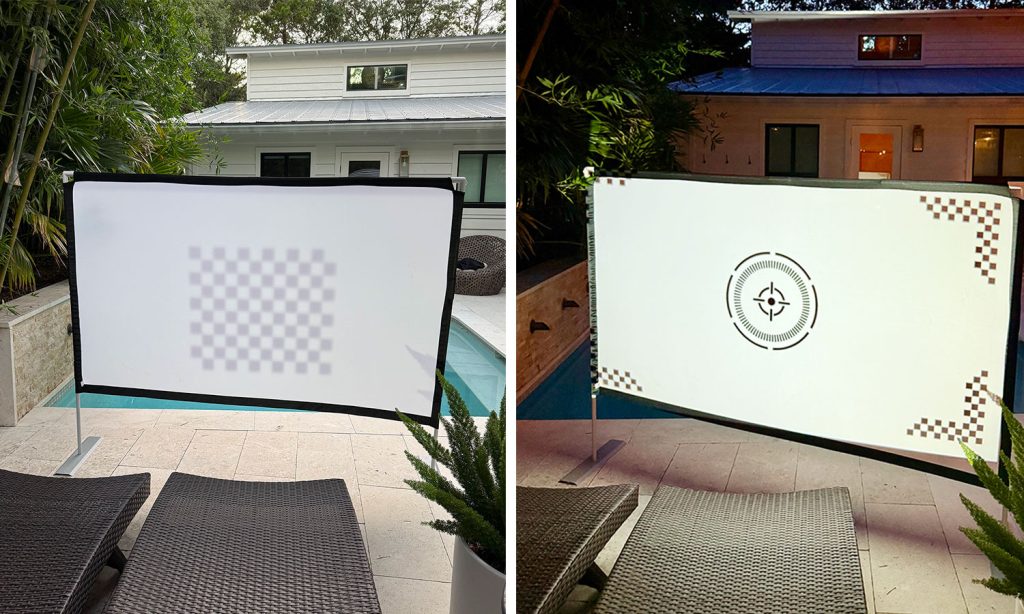
Wait for a dark sky
With late summer sunsets, it’s tempting to get started as soon as the sun is down (if not sooner). But unless your screen sits under a covered porch, we suggest waiting for full darkness for the best picture experience. Here’s an idea of how much clearer the picture is by just waiting 10 minutes.
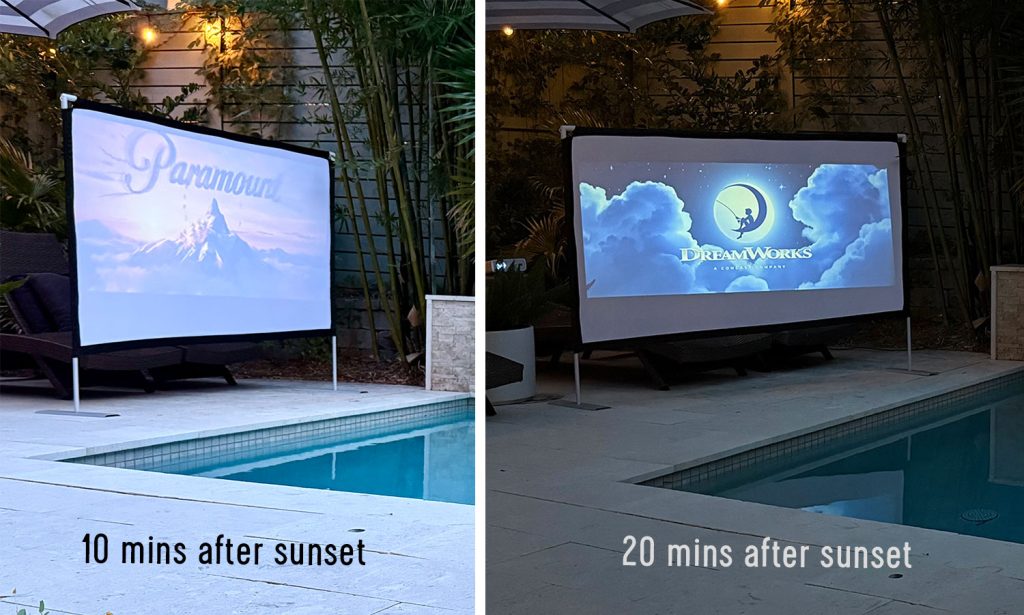
Keep this – plus the length of your film – in mind when planning your outdoor movie night. We were out until nearly 11pm the first time!
The auto adjustments are helpful, but not perfect
While I’m really grateful for the auto-focus and auto-keystone features, I usually fine tune both manually. It’s fairly easy to do from the settings menu. Once you make your manual adjustments, you may want to turn off the automatic features because any movement – say someone bumps into the projector or the wind blows your screen over – will trigger the auto-adjust and reset your manual settings.
Your first set-up is the slowest
Setting up took me about 40 mins the first time and maybe 25 minutes the second time. But I have become more efficient each time as I refine my arrangement & streamline my process. You’ll learn the best spot for your projector, the perfect angle of your screen, and optimal speaker placements over a few movie nights. So be patient with yourself. Now I’ve got it down to about 10 mins!
Be open to renting your movie
The biggest drawback to this projector is not being able to stream services like HBOMax, Peacock, or AppleTV. Yes, I can connect my laptop via USB or HDMI adapter. But that’s an extra step (and extra cords) I’d rather not bother with most nights. So even if I can access a movie for free on one of those services, we usually spend the $4 to rent it through one of the built-in apps like Amazon Prime or YouTube instead.
Think about seating options / viewing angles
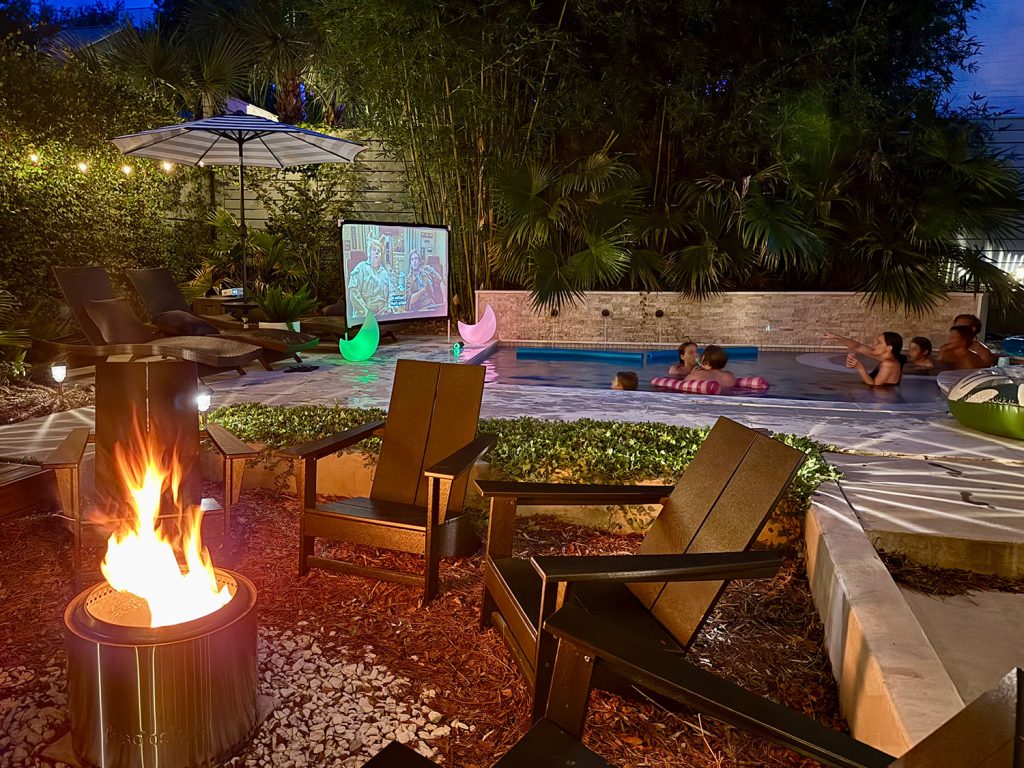
We’ve only used this in the warm summer months, so the pool has been the favorite viewing spot so far. But we still angle the screen so folks can watch from dryer / warmer spots, like by the fire pit. As the weather cools we’ll probably move the screen closer to the fire (or hot tub!) and will bring out some cozy blankets to cuddle up with. Actually can’t wait for that.
So far, the only regret we have is not buying these supplies a few summers ago!
Other Posts You Might Enjoy
Here are some related posts you might find helpful – from more technology we love to details on our backyard pool makeover.
*This post contains affiliate links, so we may earn a small commission when you make a purchase through links on our site at no additional cost to you.