

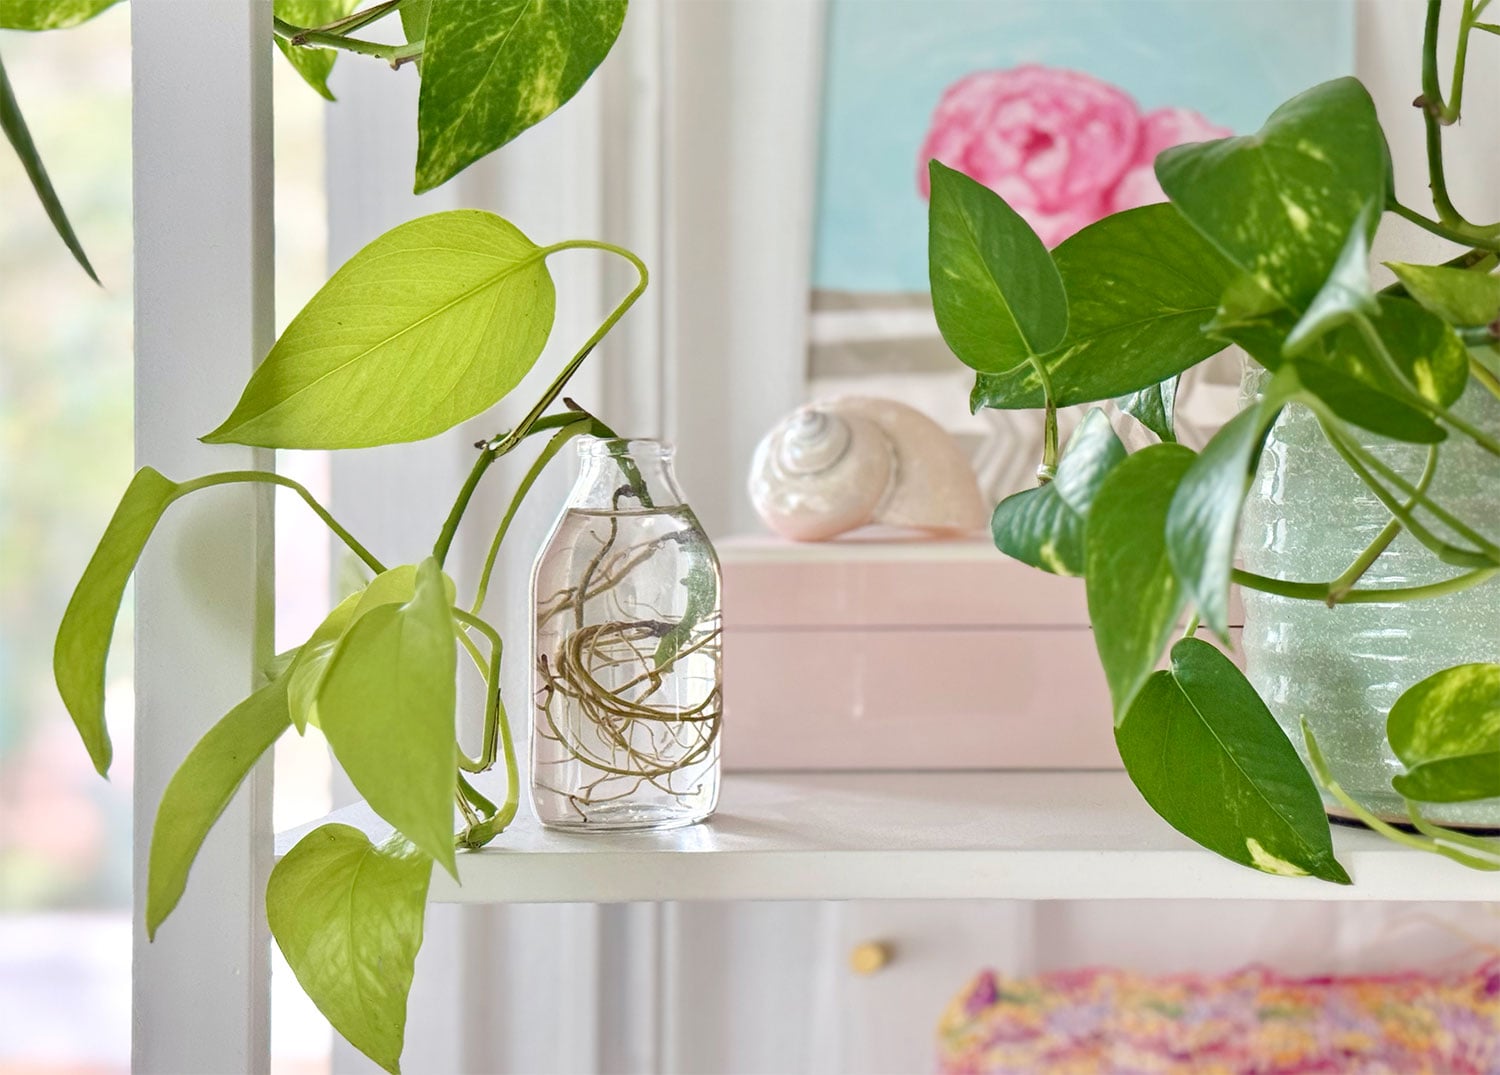
Pothos plants (Epipremnum aureum) aren’t just low-maintenance houseplants to own, they’re also some of the easiest to propagate! Propagation is a fun way to grow new pothos from your existing pothos plants, while also helping them stay healthy, full, and looking their best. And, since it requires no special tools or skills, it’s a virtually free way to grow your plant collection! We have, no joke, generated at least 12-15 free pothos plants using this method! You can even use them as gifts for friends and neighbors.
The propagation methods described below should work for all species of pothos (sometimes called Devil’s Ivy). You can read more about our favorite easy-care pothos varieties in our plant guides:
Why Propagate Your Pothos
You may think propagating plants is just for hardcore houseplant enthusiasts with too much time on their hands. But propagation is an easy and approachable way to get more out of your plants… even for beginners! It’s really a no-brainer, super-simple DIY project. Here’s why:
- Low risk: Pothos are some of the easiest houseplants to propagate, so you’ll be rewarded with minimal effort.
- Practically free: Most people can propagate using supplies they already own.
- Healthier plants: Pruning your pothos promotes new growth. So even if your clippings don’t propagate, you’ve helped your main plant (aka “mother plant” or “parent plant”).
- Less waste: Propagation keeps your clippings out of the trash
- Save money: Grow – don’t buy – new plants to add to your collection
- Great gifts: You can pass a new plant along to a friend or family member
- Fuller pots: Propagated clippings can be planted back with their mother plant for a fuller look
And if that isn’t reason enough, propagating plants is also pretty fun to watch!
The Best Time To Propagate Pothos
Your propagation efforts have the greatest chance of success in the spring and summer months, during a pothos’ growing season. This is true for most houseplants, but it’s not an absolute rule…

You can certainly continue propagating in the fall and winter months, but cuttings may take longer to root or not root at all. During those months, we typically won’t start any new water propagations, but we will stick any pruned vines back into the mother plant’s soil. At worst, they don’t root, and we just pluck them out later. But they often will root, and we’ve helped our mother plant look fuller.
Where to Cut A Pothos For Propagation
To propagate a pothos, cut your vine just below a leaf node. Luckily, nodes are easy to find on pothos plants! They are the small bumps on the vine and usually have (or had) a leaf growing from the opposite side. These nodes are where new roots will form during propagation, and each node has the potential to become a new, separate pothos plant.
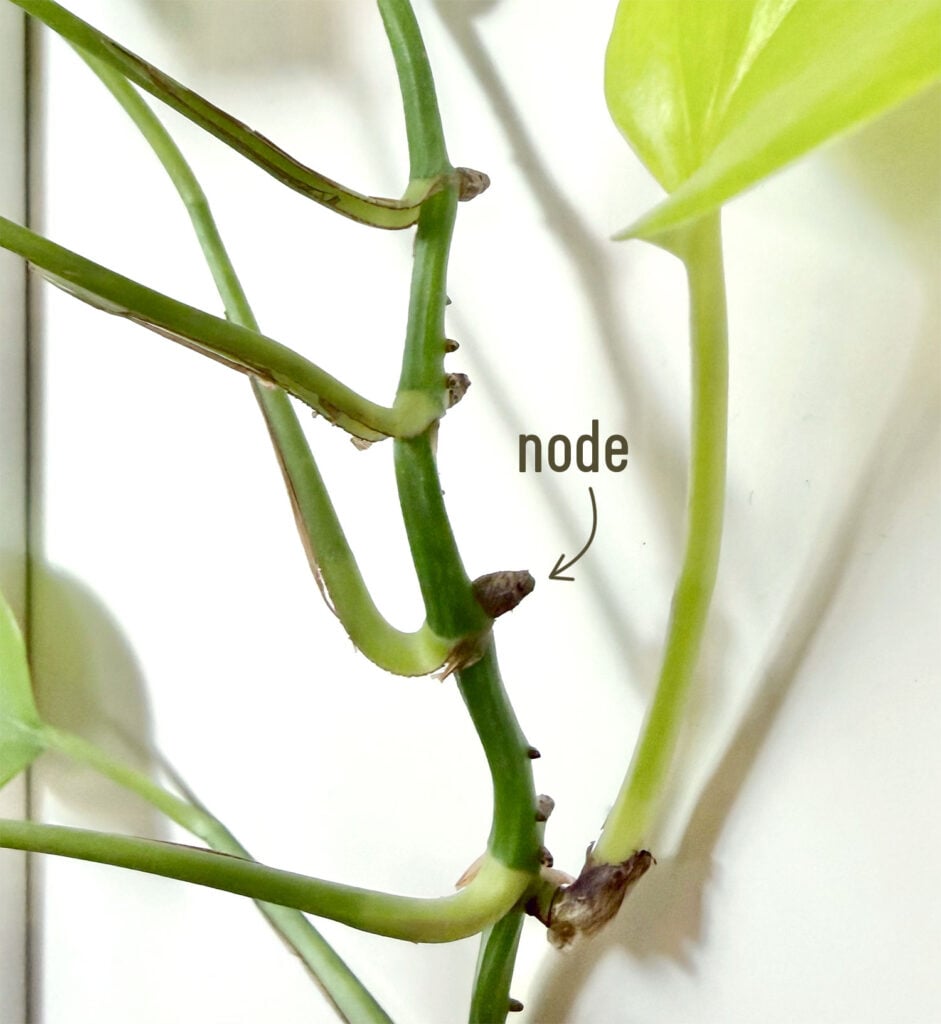
The photo above has many nodes by the way. I just pointed to one, but all of those rounded nubs protruding from the stem are nodes.
You just want to pick a healthy stem or vine on your parent plant to cut from – preferably one with new growth at the bottom and a leaf near the node(s) you plan to propagate. You can cut off as few as 1 or 2 nodes, but the more nodes you take, the more new plans you can grow. Try to leave at least 1/3rd of the original vine on the mother plant so it can continue to grow.
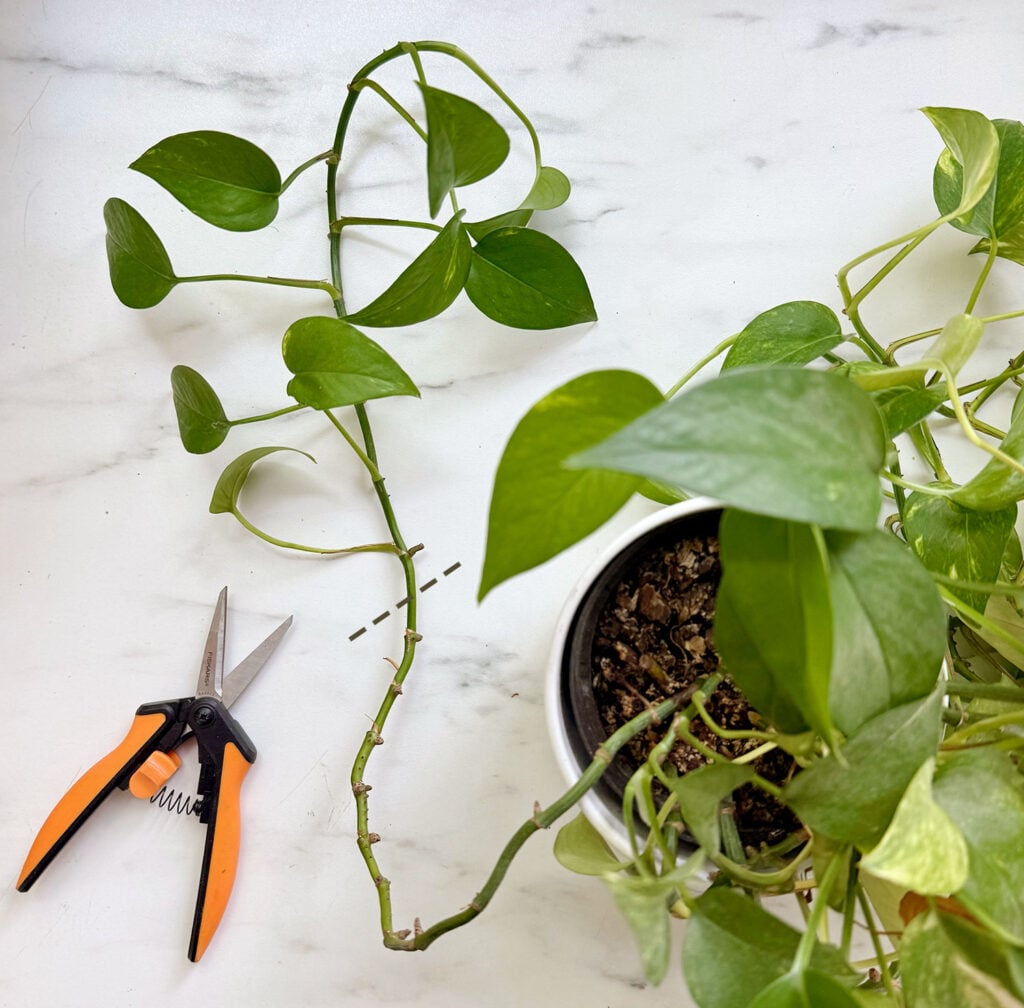
We typically let our pruning goals determine which vines we cut from and how much we remove. We look for vines that are getting too long or leggy – like the one shown above. We will propagate the bottom and cut off the rest of the bare vine. You can also try this “miracle” paste to regrow pothos leaves on bare nodes. We’ve had luck with it working about 75% of the time!
How To Propagate Pothos In Water
Water propagation is the most popular (and most fun) way to multiply your pothos cuttings into new pothos plants. It’s always our first choice because you can actively watch new roots grow!
Step 1: Take A Stem Cutting
Use clean* sharp scissors to remove a healthy section of pothos vine as described above. Make an angled cut just below a node (about 1 cm under the bump). This cut vine can be used altogether, or you can cut the vine between each node to create more (but smaller) starter plants. Be sure there is at least one leaf on each cut section.
*It’s important to clean your scissors or shears to prevent the spread of bacteria or disease from one plant to another. A quick way to disinfect them is to wipe or spray them with rubbing alcohol.
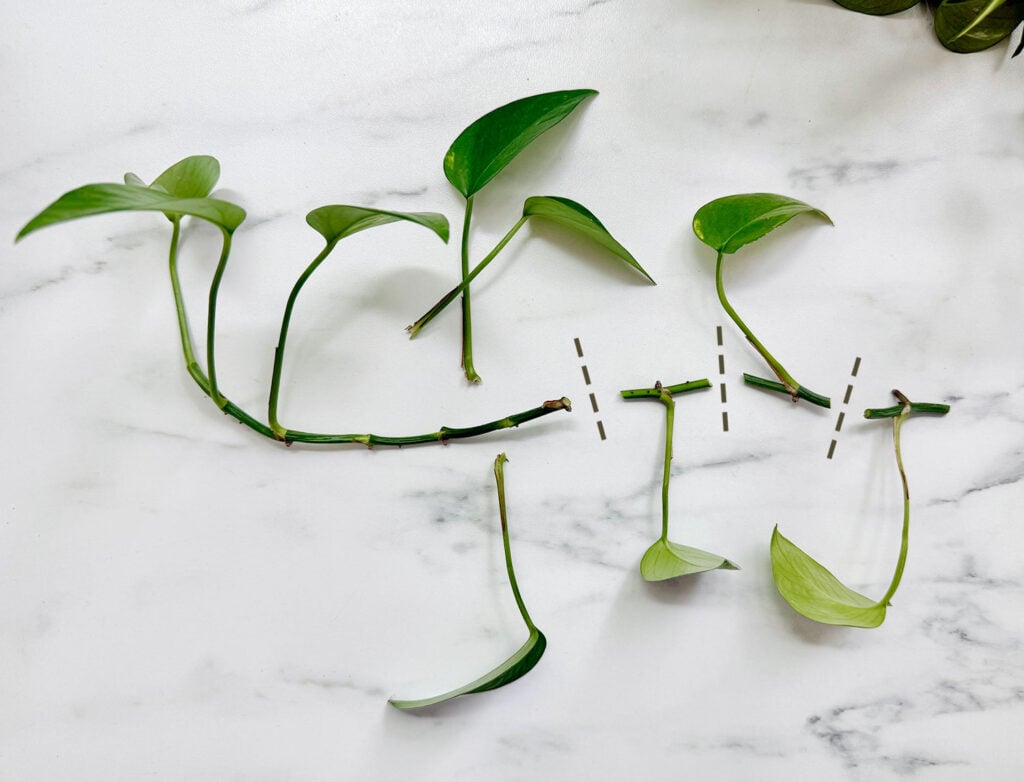
For my cutting, I’m going to propagate the 3 top nodes individually and then use the remaining bottom section of the vine as a whole.
Step 2: Remove Bottom Leaves
When propagating a longer vine, remove the leaves from any nodes that will sit below the water line. Submerged leaves will rot and spoil your water & cutting. That’s why we’ve plucked off a few leaves in the photo above. Skip this step if you are propagating individual nodes.
Step 3: Place Cuttings In Water
Fill clear, glass vessels with room-temperature water. Tap water works great. Make sure all the nodes that you want to produce roots are submerged, but not any leaves. You can use a clothespin or bobby pin over the mouth of your vessel to keep your cutting in place if needed.
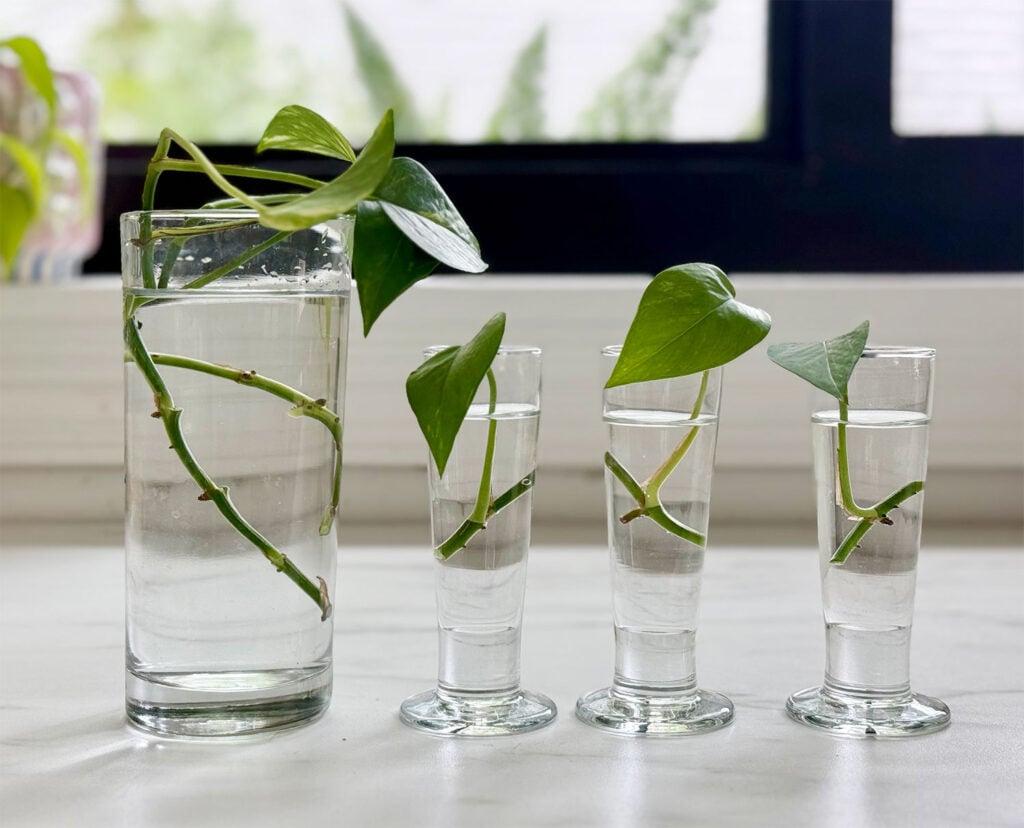
Any type of vessel will work, but a clear glass cup or jar makes it easiest to monitor your water and watch for root growth. Clear vessels also allow the most light to reach the cutting. Place the vessel in a spot that gets plenty of bright, indirect sunlight. We love lining these up on a windowsill, desk, or bookshelf in the sun.
Step 4: Monitor The Water
Keep an eye on your water’s clarity and level. You may need to top off your vessel as water evaporates. You can also change the water if it starts to look excessively green or murky, but we rarely experience this.
Step 5: Transfer Rooted Cuttings To Soil
Pothos roots may develop from the node in as little as 1-2 weeks, but we usually leave them for a month or two. They are very happy in water, so there’s no “ticking clock” to remove them at any point. But let the roots grow at least 2-3 inches before transferring the cutting to soil.
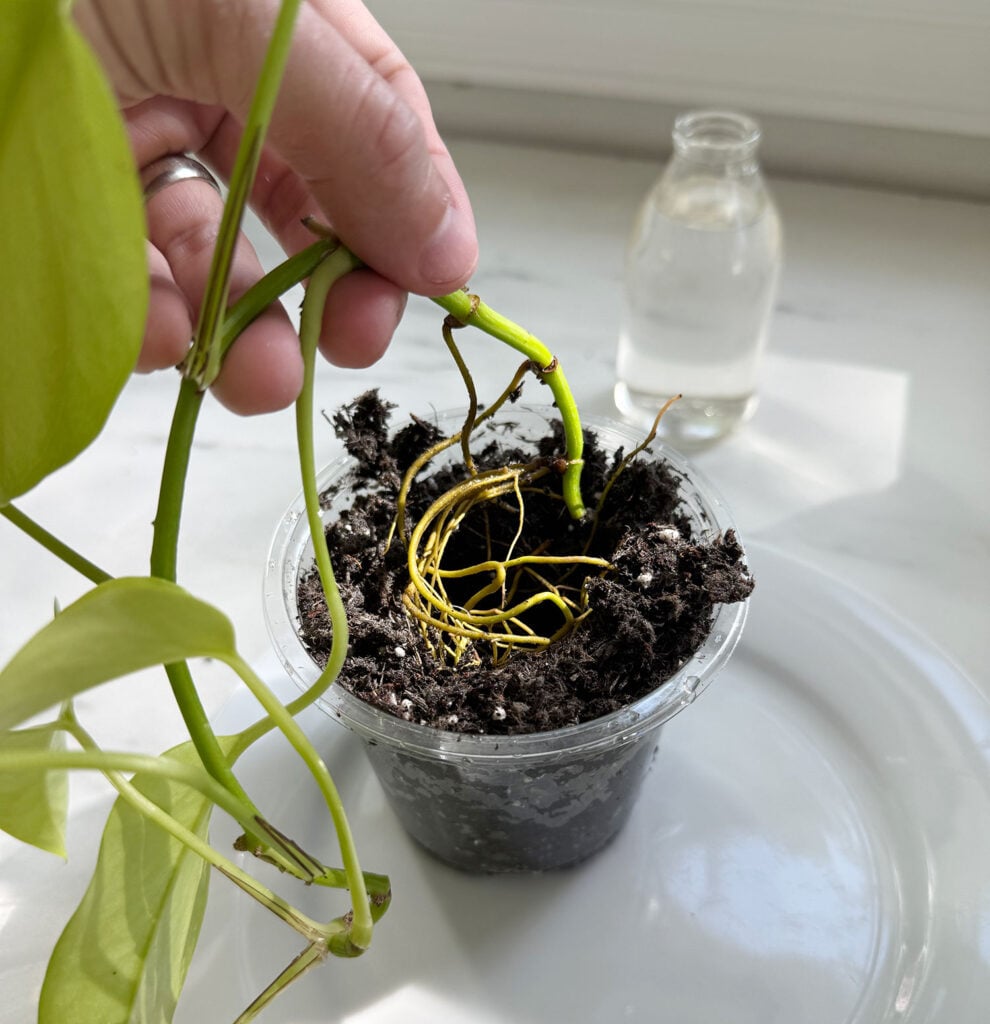
Be sure to use a well-draining potting mix and a nursery pot with drainage holes. Once potted, give your new plant a good watering and return it to a spot with bright indirect light. Keep the soil moist for the first couple of weeks to help the roots establish in their new home.
How To Propagate Pothos In Soil
Soil propagation is another popular technique for pothos plants. The advantage of this method is that it eliminates the step of transferring your cutting from water to soil. However, you won’t be able to watch new roots grow, which makes it a bit harder (and less rewarding) to gauge your success.
Step 1: Take A Stem Cutting
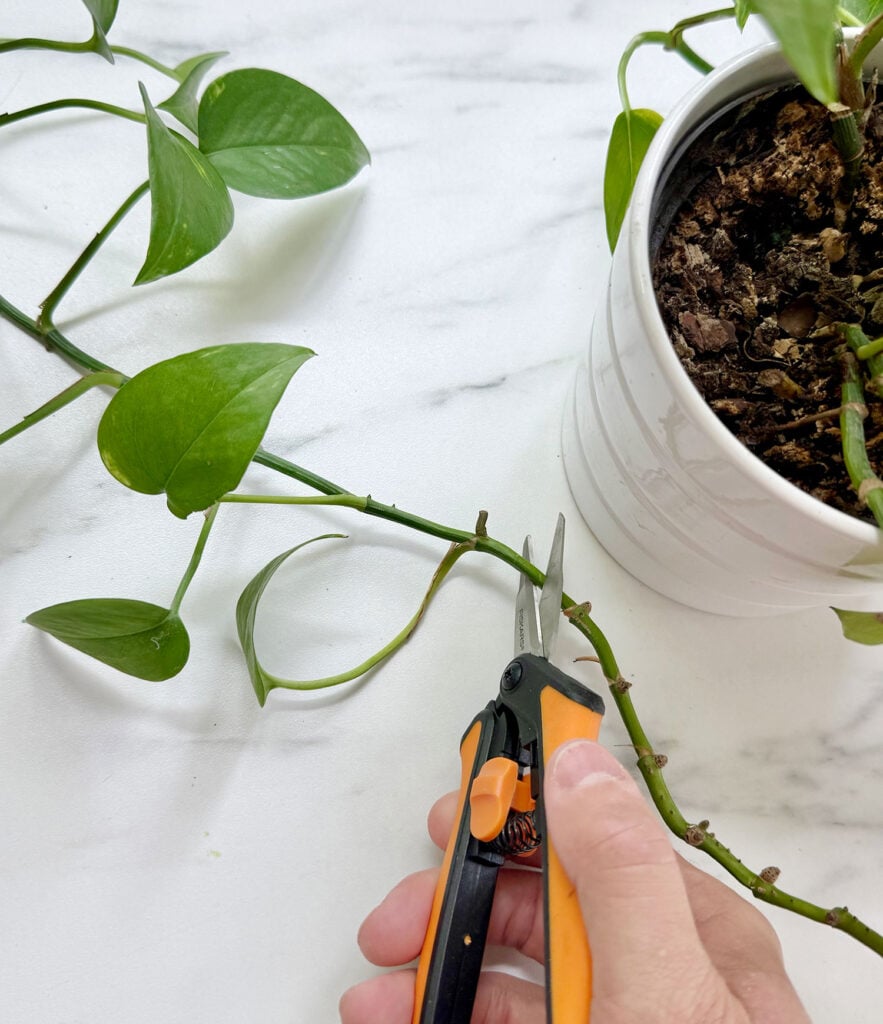
Like with water propagation, use a clean, sharp pair of pruning scissors to cut your pothos vine slightly below a node. We like to take a cutting with at least 3-4 healthy leaves.
Step 2: Remove Bottom Leaves
Pluck off the leaves from the lower 2-3 nodes on your cutting so that they can easily be buried in the soil. The more nodes you bury, the more chances you’ll have for strong root development, so feel free to do more. Just be sure to leave 2-3 leaves above the soil as well.
Step 3: Plant In Soil
Fill a small nursery pot with well-draining potting soil. We like to moisten the soil first by running water through the pot and letting it drain out the bottom. Just don’t compact the soil too much. Then, plant the cut end of your vine in the soil, making sure the appropriate nodes are fully buried (no leaves should be under the dirt). Cover and pat the soil gently to keep the cutting in place.
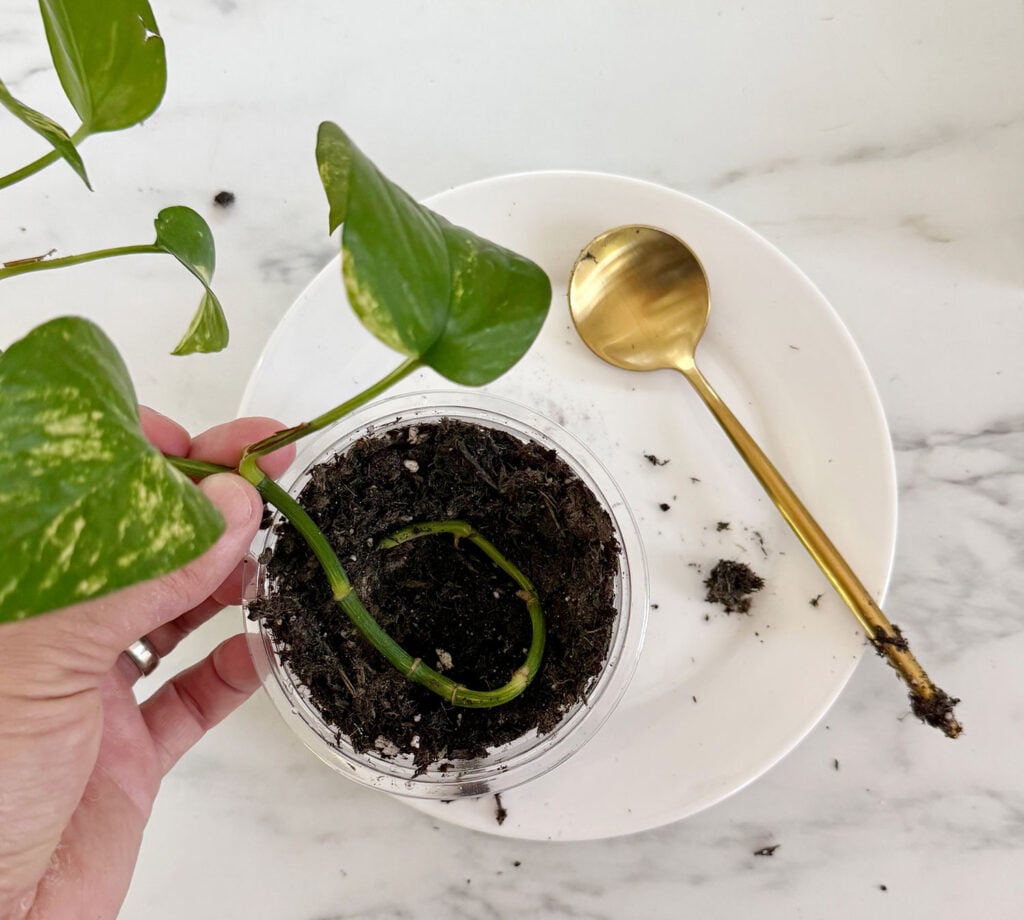
You can also use a bobby pin, paper clip, or plant pins to keep the cutting in place. These help the nodes stay in contact with the soil so they can develop roots. This is especially great for longer clippings, where you may need to coil the excess vine on the surface of the soil.
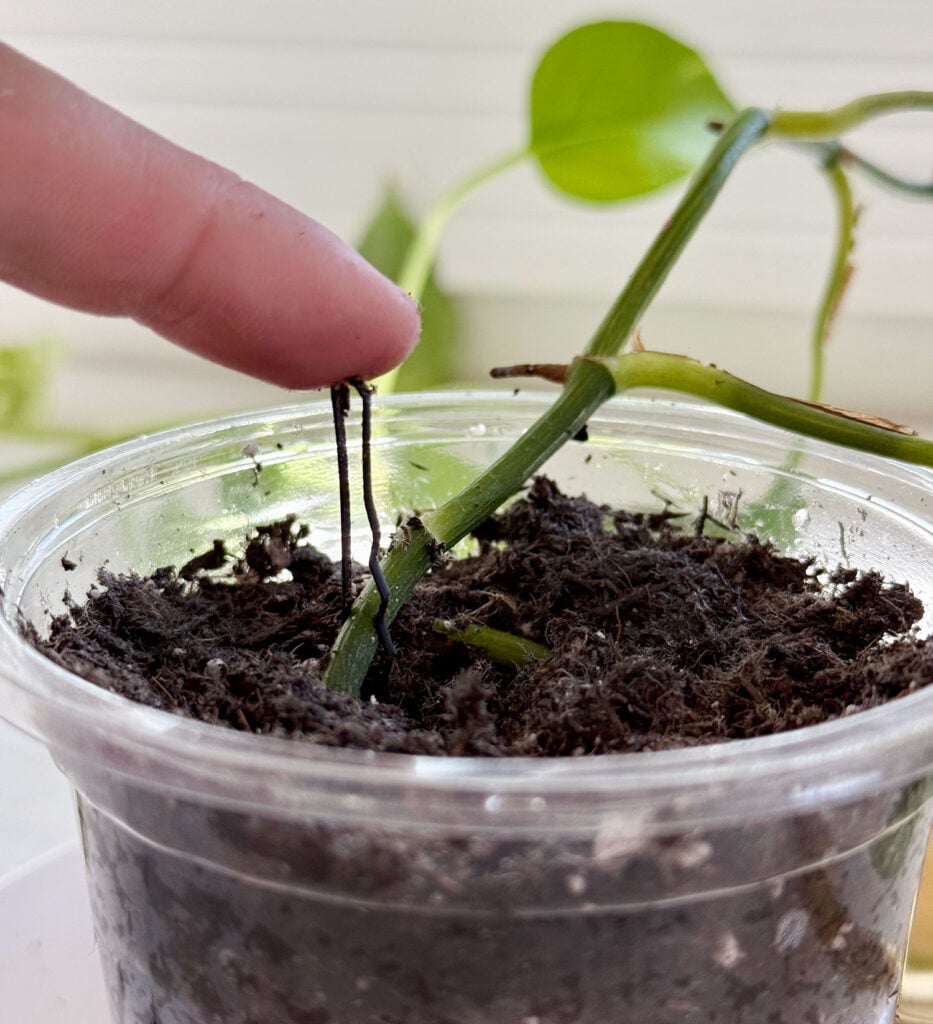
You can also plant multiple cuttings in one pot or follow this process in the same pot as the mother plant. This method (which is often called “basketing”) is a great way to keep your pothos looking full and healthy.
Step 4: Water Regularly
Put your potted cutting in a location that receives bright, indirect light and keep the soil moist for the next several weeks while roots develop. You will need to water it more regularly than an established pothos. Just be sure the pot drains well so it doesn’t sit in water (which can rot the roots). If your new plant seems to be doing well after a few weeks, you can begin to space out your waterings.
Other Pothos Propagation Methods
Propagate Pothos In Sphagnum Moss
Sphagnum moss is an absorbent natural material that can be used as a propagation medium, with similar steps to soil propagation. Some prefer to use sphagnum moss because it retains moisture very well, which helps to promote root growth. However, there’s no strong advantage over other methods, especially if you don’t already have it on hand.
Spaghnum moss is sold when it’s dry, so it must be soaked in water for about 30 minutes before use. Wring out most of the water, leaving the moss moist, and place it in a jar or other vessel. Plant your cutting in it (just like you would with soil) and water it regularly to keep the moss moist while roots develop. Once they’ve grown a couple of inches, you can remove the plant from the moss and plant it in soil.
Pothos Basketing
I mentioned this method a few paragraphs ago, but another option for propagating an established pothos is called “basketing.” It doesn’t produce new plants, but can help a stringy or leggy pothos look much fuller and healthier. Pothos, especially those with dangling vines, tend to look bare at the top over time. This is because the plant is focusing its energy on growing new leaves at the end of the vine. As older leaves at the top die and fall off, the upper part of the plant can become sparse and bare.
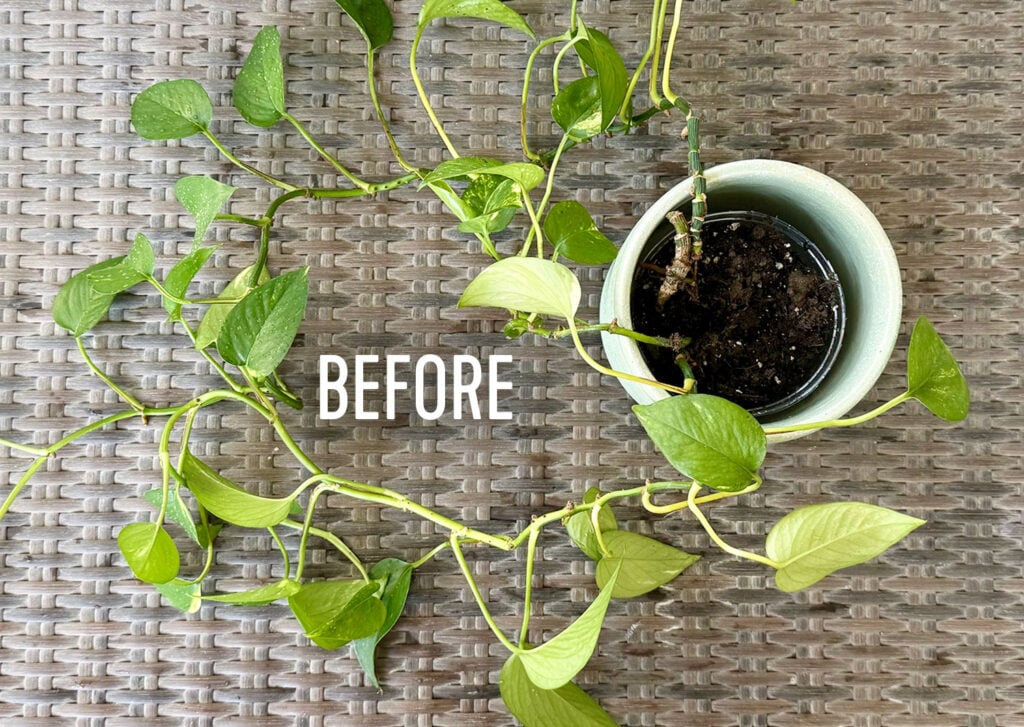
To fix this, just coil those long vines into the pot so that several nodes come into contact with the soil. Pretend like you’re making a basket or nest of vines atop the dirt. If needed, you can use plant pins, bobby pins, or paper clips to hold the nodes tightly against (and ideally, slightly under) the soil. Over time, these nodes will establish new roots and may shoot new growth down into the potting soil.
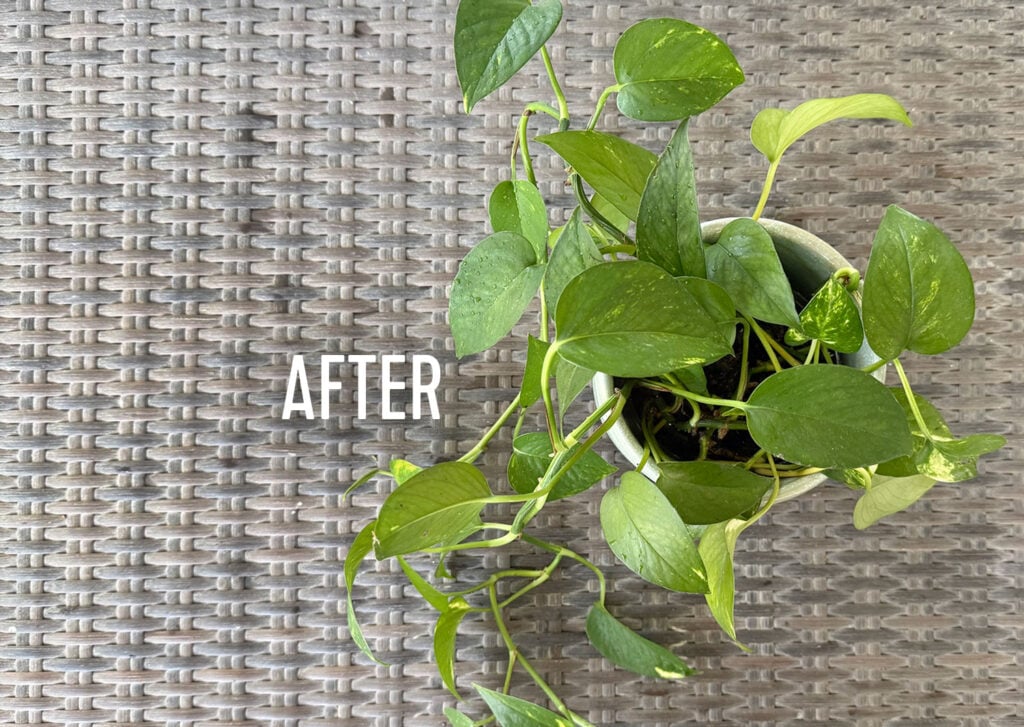
Even if new roots don’t establish quickly, basketing your pothos immediately helps the plant look fuller and healthier. And don’t worry if you miss those long, dramatic vines – they’ll grow back quickly!
Where to Place Your Propagation Vessel
It’s best to place pothos propagation vessels in areas that receive lots of bright, indirect light. Even though pothos are one of our favorite low-light plants, they need ample sunlight to produce new growth during propagation. Windowsills or sunny bookshelves are great options, but avoid spots that get prolonged direct sunlight. This can cause your water to evaporate quickly, burn your leaves, or accelerate algae growth – although we’ve never had this happen, even in a sunny windowsill.
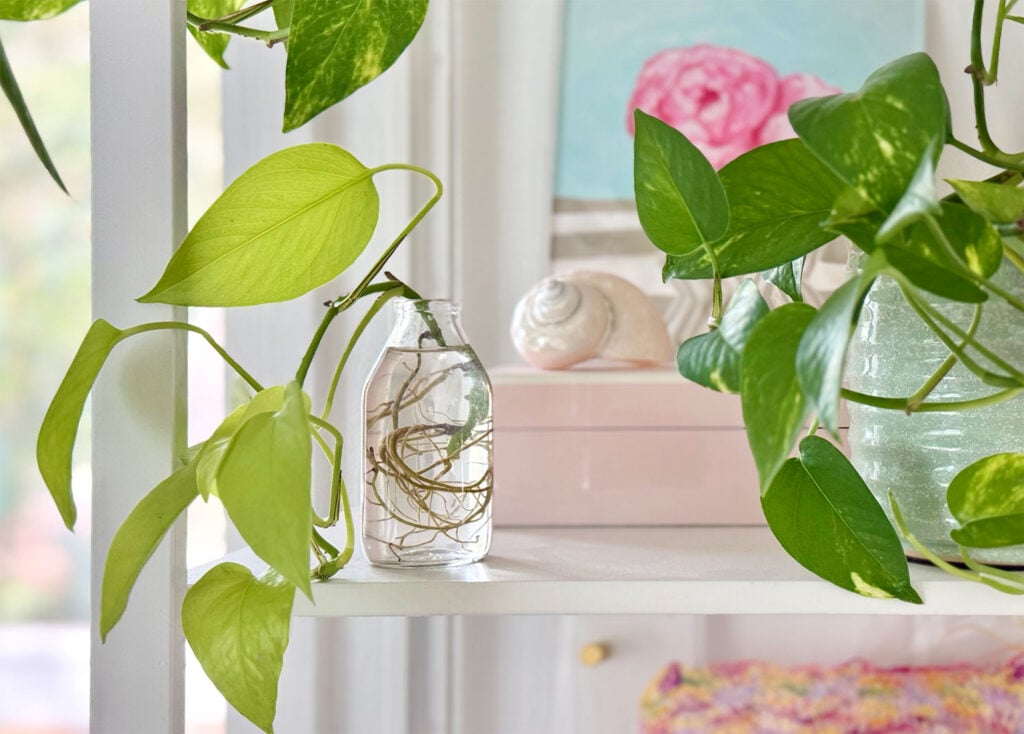
Your propagating plants also need warmth, so keep them away from drafts or blasts from your A/C vents. We also suggest putting them somewhere you can easily check on them – like a kitchen window. This will help you better monitor water levels and root growth.
How to Care For Pothos
Once your propagated pothos has had a few weeks to establish in moist soil, it can be cared for just like your mother pothos plant. We have detailed plant care guides for golden pothos, neon pothos, and marble queen pothos varieties (along with tips for telling them apart). Also Marble Queen would make a great band name.
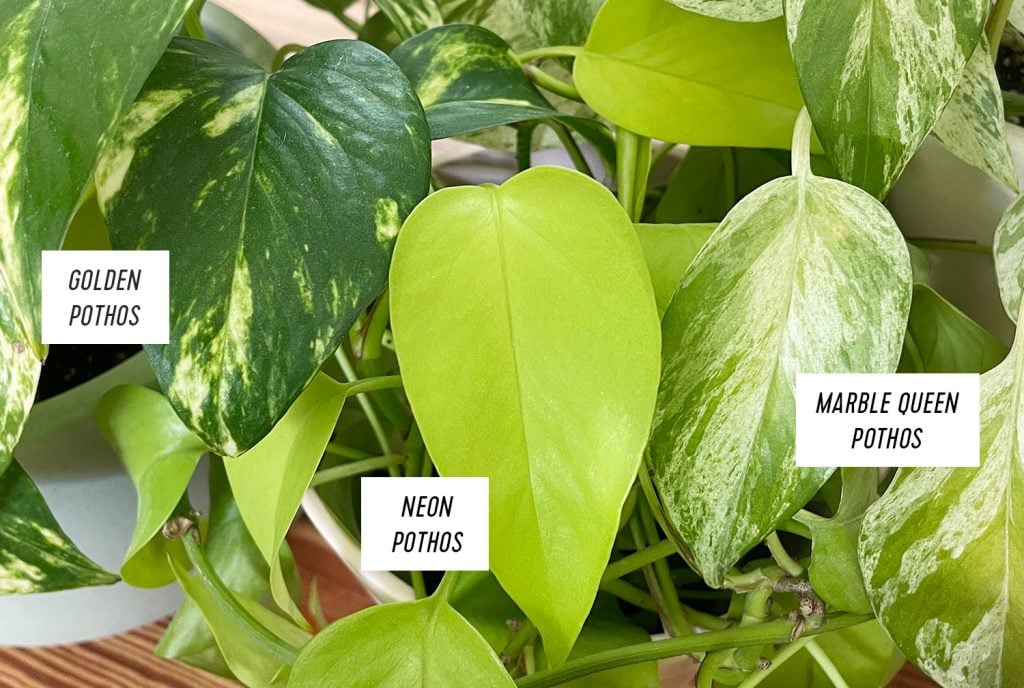
Overall, these plants enjoy locations that receive medium, indirect light but also tolerate low-light conditions as well. They like to be thoroughly watered every 7-10 days, allowing the soil to dry out between waterings. Underwatering is preferable to overwatering, and make sure they don’t sit in excess water. We typically like a layer of small rocks on the base of a planter full of potting soil, which helps to ensure that there’s not a bunch of standing water gathering at the bottom of the pot.
More Plant Guides

If you’re looking for more information on some of our favorite plants, check out some of these posts below:
*This post contains affiliate links, so we may earn a small commission when you make a purchase through links on our site at no additional cost to you.