

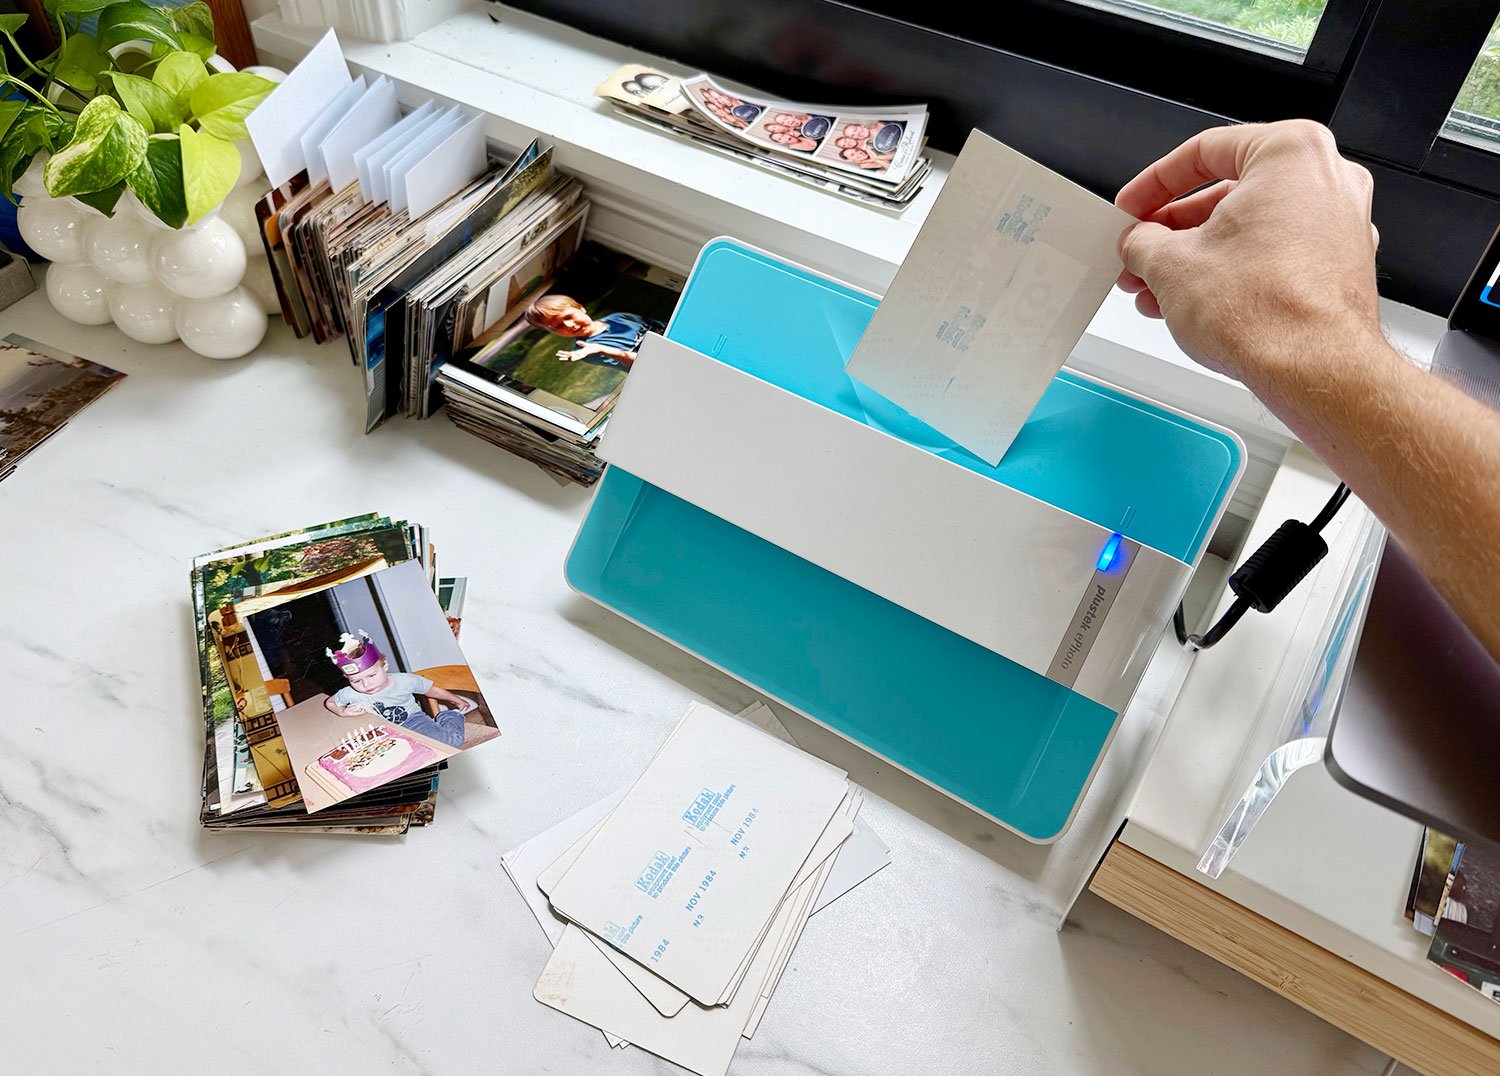
When I hyper-focus on a task, I’m known to go ALL IN. And that’s exactly how I approached the giant job of digitizing all of our old photo albums. We crowdsourced suggestions, took some deep dives into message boards, and Googled the heck out of it. From there, I narrowed our options to 5 photo digitization methods that we tested for quality, price, and speed. There was one clear winner for us, but also lots of other good ways to go about it (even free ones!), depending on your personal priorities. So I’m going to lay out everything we tried, and why we had a clear favorite.
As always, none of the products or methods mentioned have been sponsored or paid for. Everything was bought and tested with our own money, and we’re sharing what we liked best for no other reason than: we really did like it best!
The Photo Digitization Methods We Tested
We tried to pick a range of tools and techniques. Some free, some pricier. Some suspiciously fast, some more intricate. They were:
- My phone’s camera (simply taking photos of pictures)
- A bulk photo scanning app for my phone
- The flatbed scanner in the printer we already own*
- A special photo scanner
- Mailing photos to a third-party photo digitizing service
*Our printer from 2018 is still going strong, so that link is the closest current model.
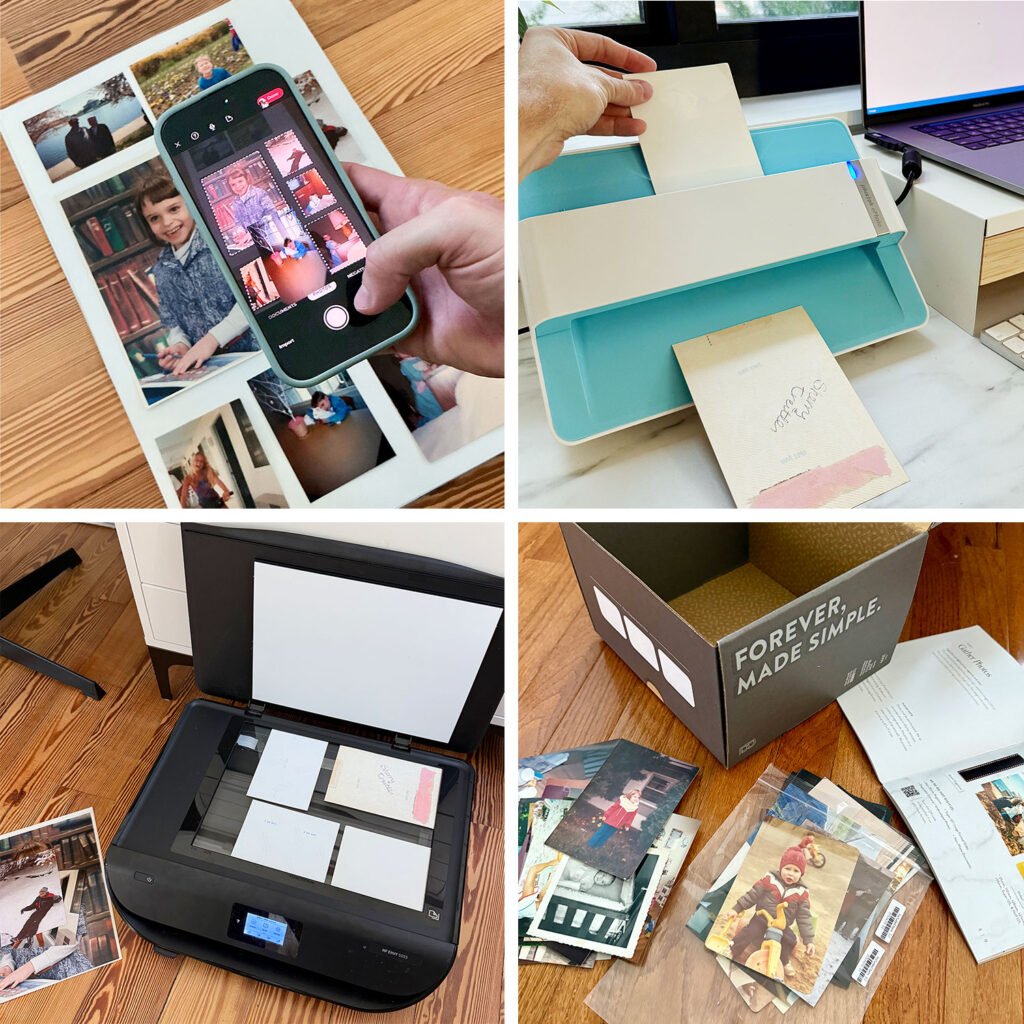
I also filmed a quick, 90-second video of how method #2 (the Photomyne app) and #4 (the Plustek scanner) operate, since they’re the more “new-fangled” techniques we tried.
Note: You can also view this video on YouTube.
In testing each of these, we paid close attention to the following criteria:
- Cost
- Quality
- Speed
- Ease
- Overall convenience
That last one is important because, like most people, we have OVER 1,500 old photos to scan. So it’s easy to lose steam if digitizing them feels like a slog. So, for us, that became the deciding factor for the overall best method.
Our Test Photos
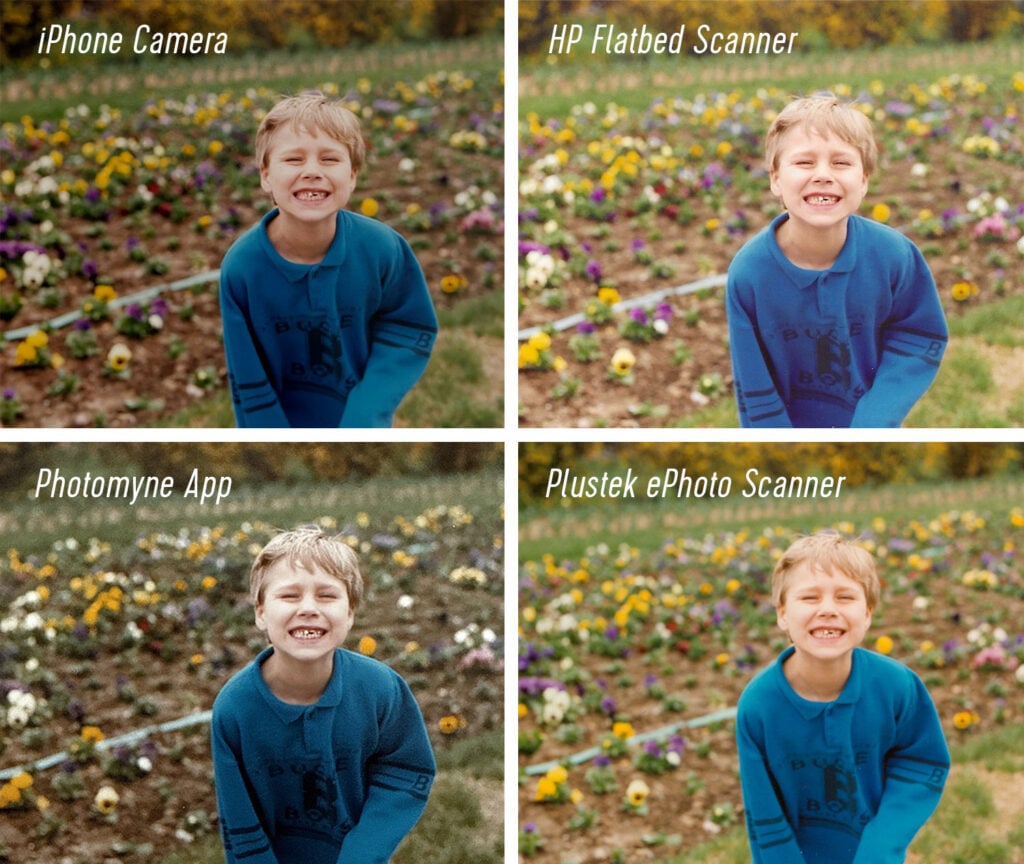
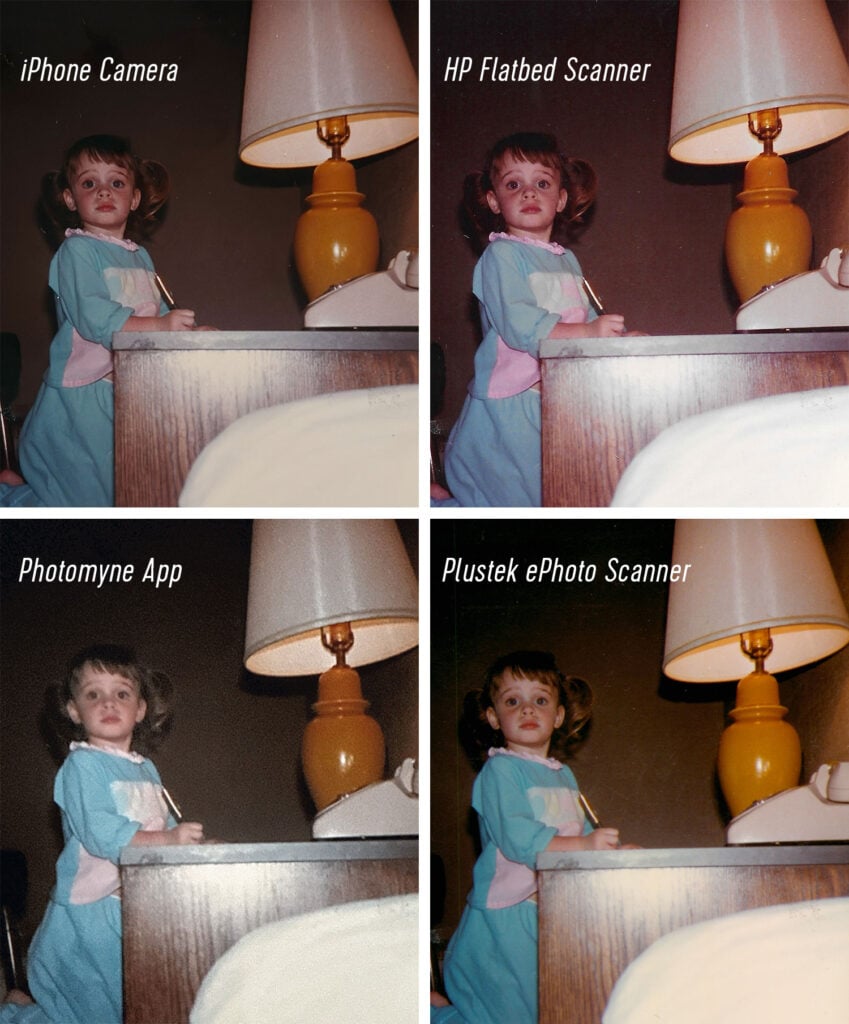
Fair warning: you’ll see these pics of young John and little Sherry A LOT in this post. I used them to get apples-to-apples comparisons on quality. I also chose this particular shot of Sherry because it’s a little dark, letting us see how these scanners handle poorly lit photos.

And unless otherwise noted, I’m showing these photos here WITHOUT EDITS or ADJUSTMENTS. This gives you an idea of what you’ll get straight out of the camera or scanner.
Best Price ($0): Your Phone’s Camera
Most of us already own a phone, so it’s hard to beat the $0 price tag for this method. So if cost is your #1 priority, you’ll be glad to know your phone’s camera is a good quality option (I’m using an iPhone 16 Pro). However, this approach takes time, patience, and some setup for the best results.
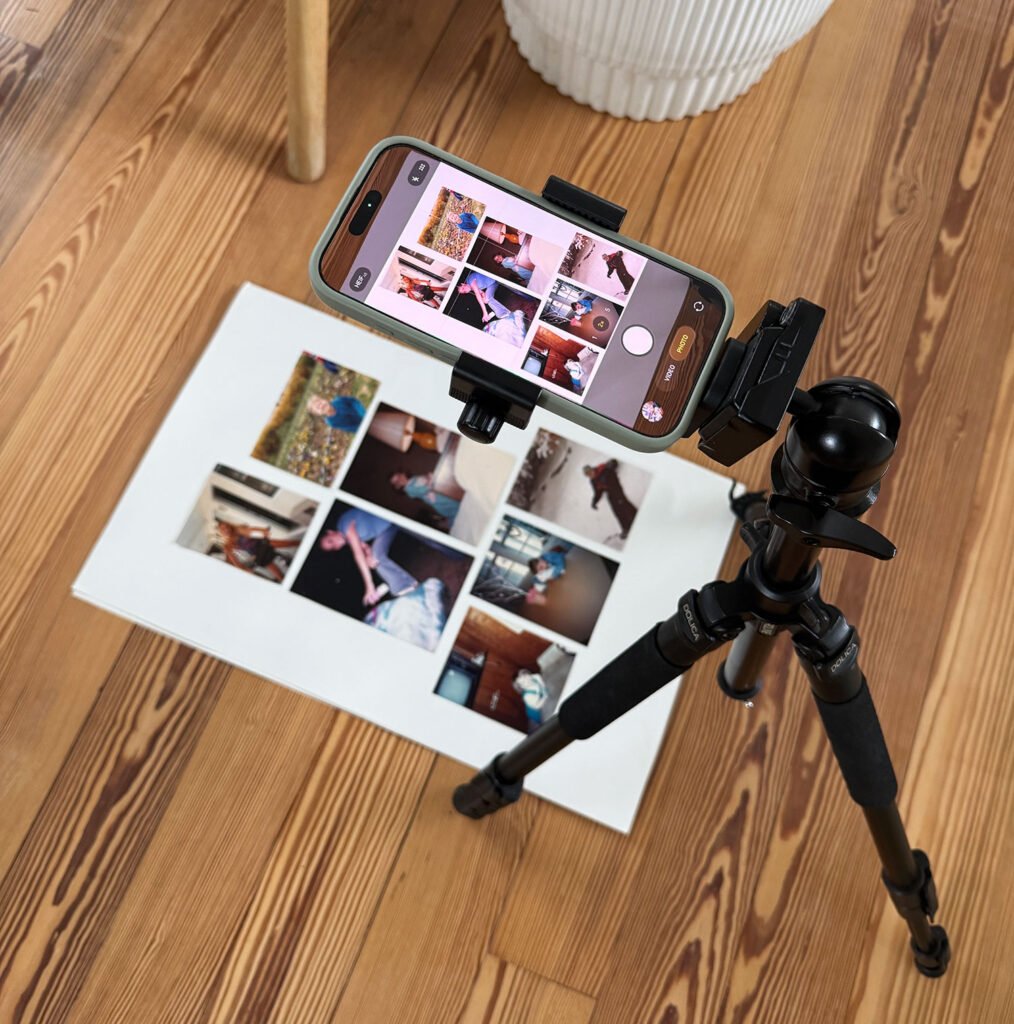
If you go this route, here’s how to get the highest quality photos of your photos:
- Set your camera to its maximum resolution (mine is 48MP)
- If possible, use a tripod and your camera’s timer to minimize blur
- Arrange your photo(s) on a white background, like a piece of poster board
- Shoot in a place with good, indirect lighting, like a sunroom or porch on a cloudy day. This will minimize glare.
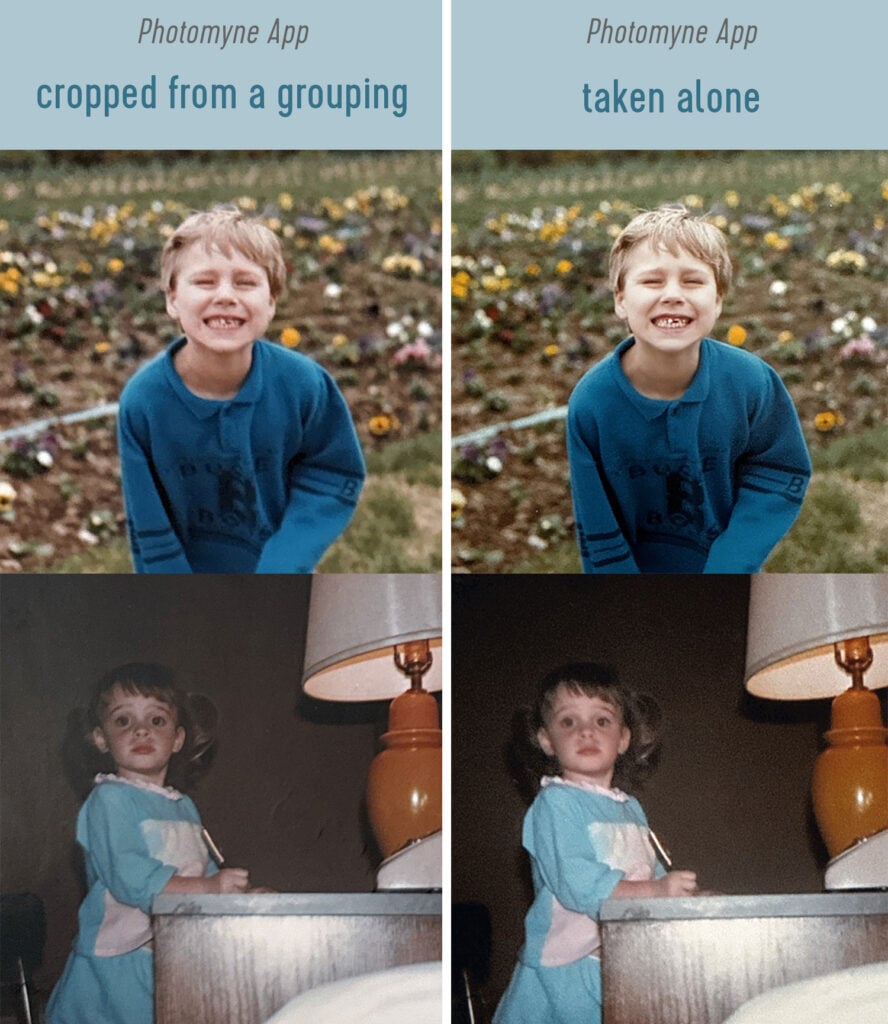
Shooting a grouping of prints together (like shown above) can be efficient, but you’ll lose some quality. Notice how the left images are a little blurry? That’s because my camera is pulled back to capture the group. For the best result, photograph your photos one by one so you can be closer to each print.
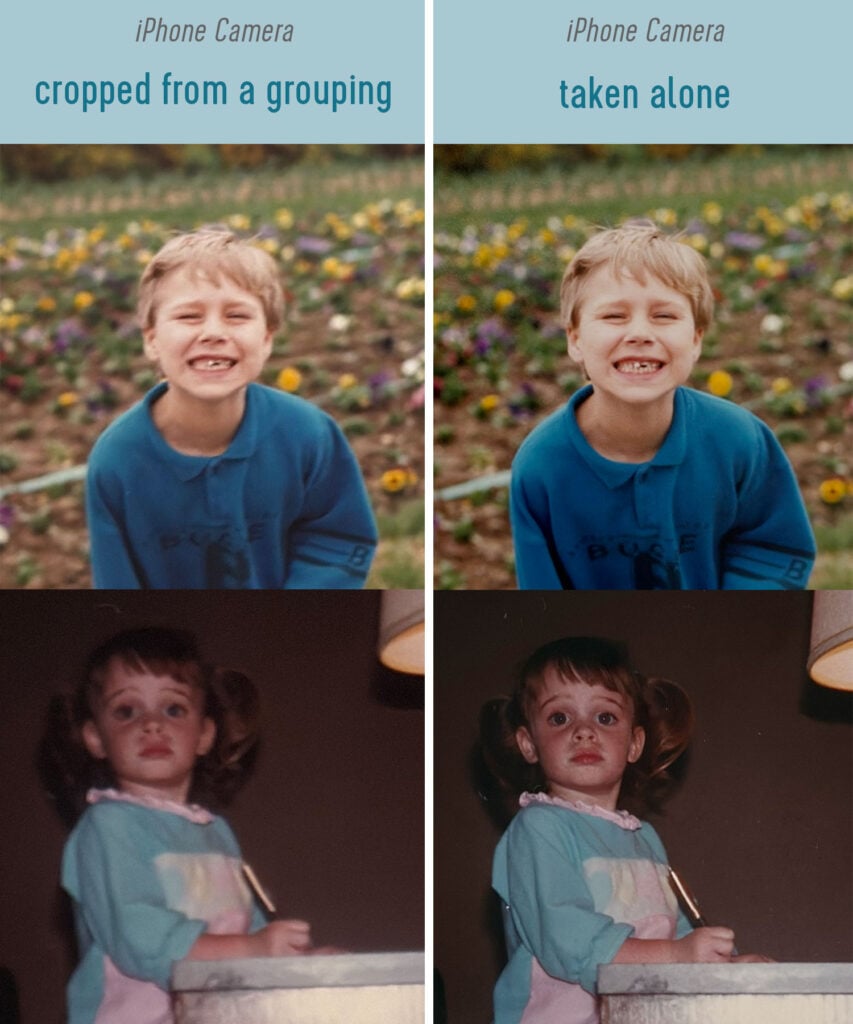
Overall, this method was way too slow for me. Even though it only took me 4 minutes to photograph 50 photos, I spent nearly 30 mind-numbing minutes cropping each one into an individual file. So, despite its pros (zero dollars! zero special equipment!), this method was way too inefficient.
VERDICT: Best method for digitizing a small number of photos without spending any money, otherwise, skip this.
Best Quality: Flatbed Scanner
If quality is your top priority, I was most satisfied with the flatbed scanner in the HP Envy printer we already own… but only just by a hair. This method cost us $0 to try, but a new one sells for about $99. That’s about 1/2 the price of the special photo scanner I’ll discuss in a moment.
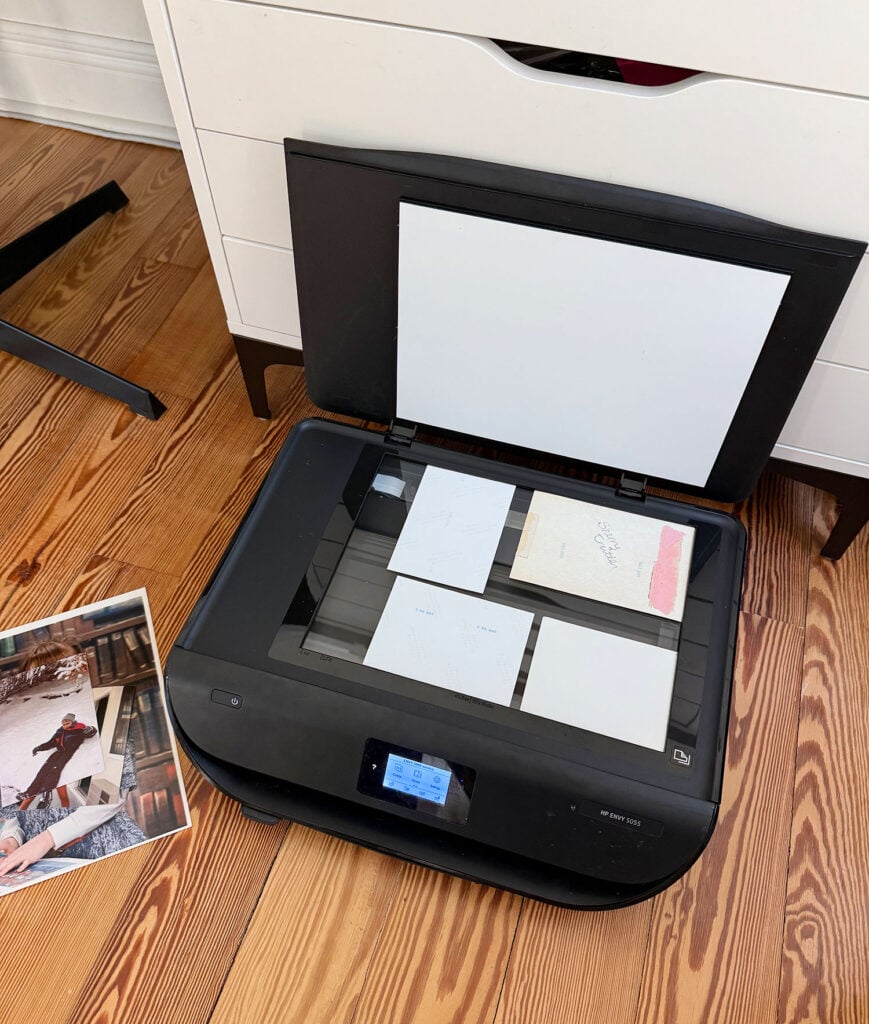
When I say “quality,” I mean that the scans were the clearest and most vibrant result without any edits or adjustments (see below). It also handled non-photo scans the best, like the greeting cards and letters I found in one of our albums. So if I were judging on versatility, this would probably win too.
I got similar results on the darker, indoor photo of Sherry. The files from my flatbed scanner were the most “ready to go” straight out of the camera/scanner. Again, the Plustek was a very close second.
Like the iPhone, the big drawback to this method is speed. I wasted a lot of time arranging photos on the glass, waiting for the scan, and then straightening & cropping the scans into individual photo files. This was the slowest method by far, so I wouldn’t recommend it if you have lots of photos.
VERDICT: Best for scanning a small number of photos you want at the highest quality. Likely will drive you crazy and you’ll never finish if you have a large amount of pictures.
Best For Speed: Plustek ePhoto Scanner
When we asked for photo scanner recommendations on Instagram, the Plustek ePhoto Scanner was the clear favorite – and we can see why! We were a little hesitant to spend $200 when we already owned a flatbed scanner, but over 1,000 people recommended it so we went for it… and I’m so glad we did. The speed and convenience it offers are lifesavers for an undertaking like this.
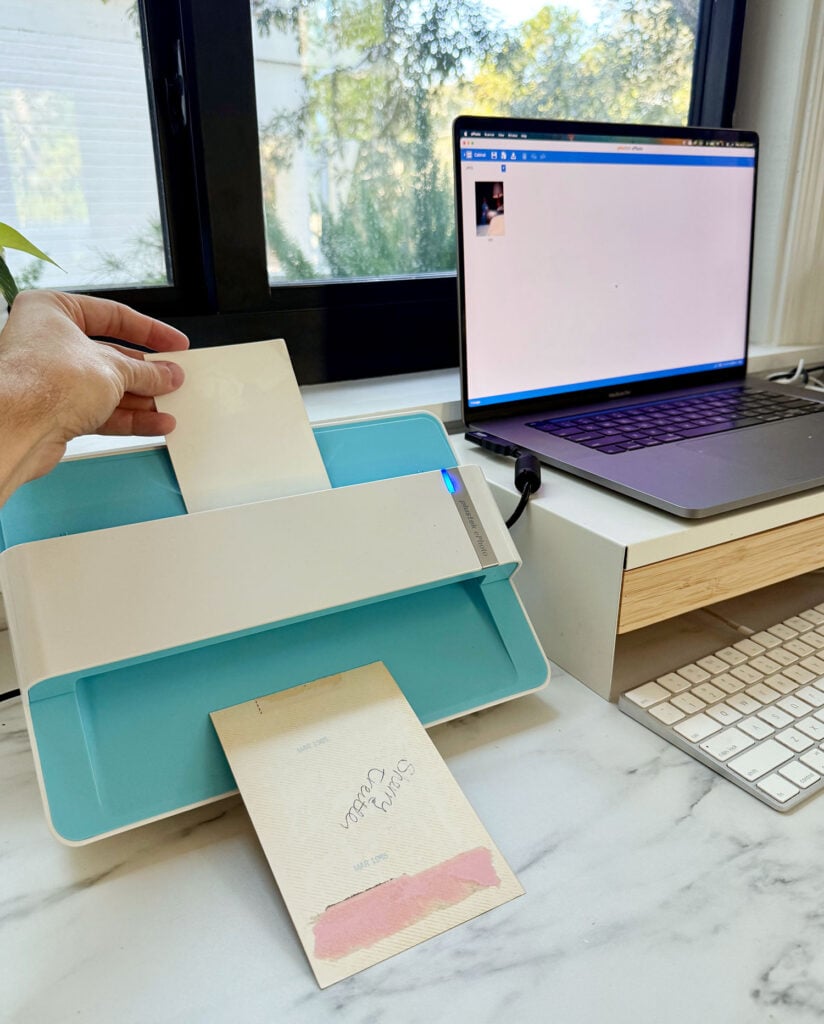
Just place a photo facedown into the scanner, and it automatically feeds through in seconds. A moment later, an already-cropped file appears in the accompanying software, ready to save. I breezed through 50 photos in less than 5 minutes, making it waaaaay faster than the two methods above. Plus, it was so simple I could’ve done it all day.
VERDICT: Best for fast & easy scanning of large batches of photos without sacrificing good, high-quality results.
Getting The Best Quality Out of Plustek
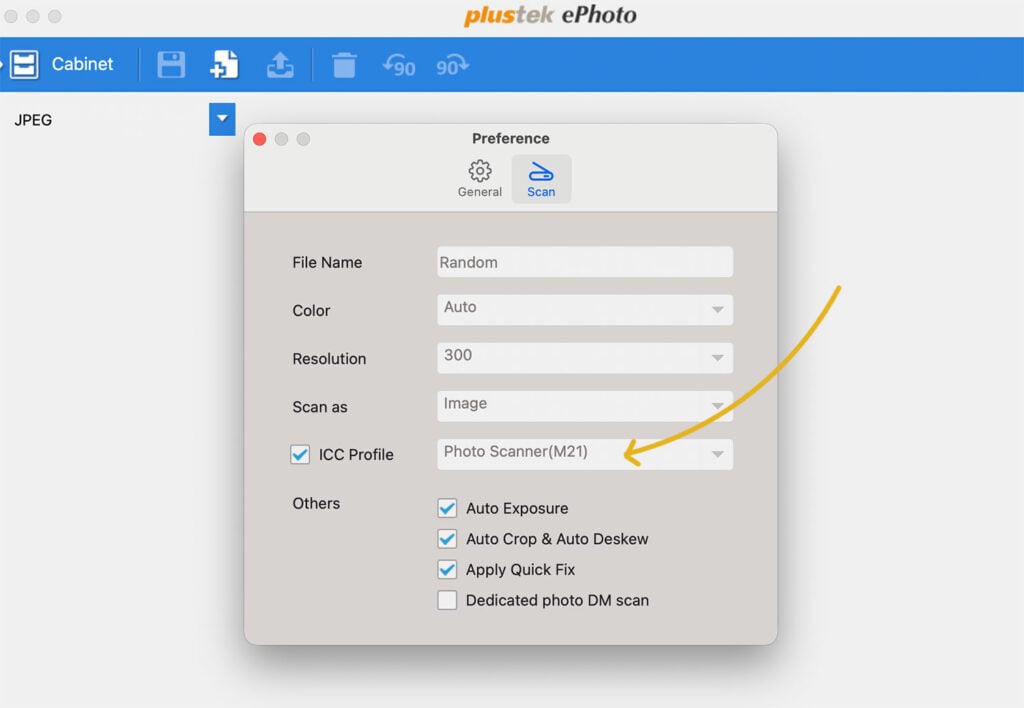
I was actually pretty unhappy with the quality of my first few Plustek scans. They were dark and took a lot of adjusting to look…just okay. But after playing with some settings in the “Preferences” menu, I solved my problem! So before you dive in, do a few test scans and noodle settings until you’re happy.
You can see my preferred settings below – the most important was turning on the ICC Profile. I liked “Photo Scanner (M21)” the best.
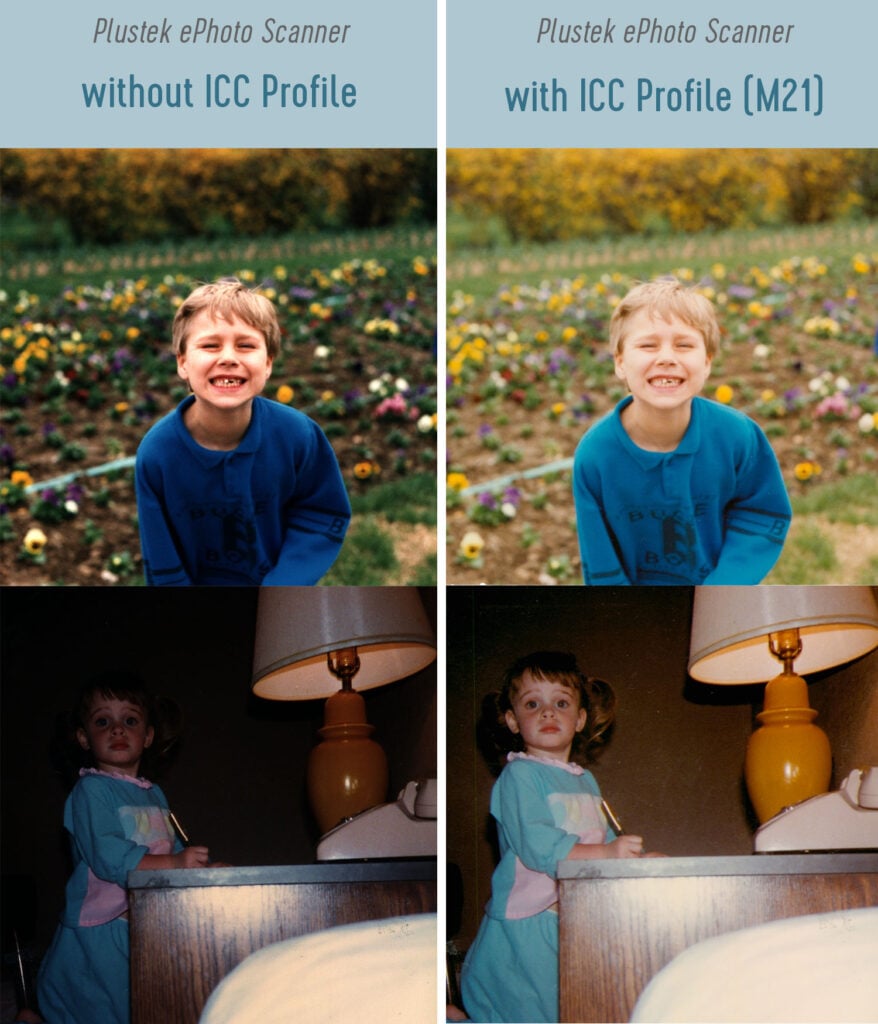
Here’s an example of what my scans looked like at first (left) and after I turned on the ICC profile (right). You can see how much brighter and more vibrant they are on the right.
The ePhoto software that comes with the scanner also includes some built-in photo & color adjustment tools, but I find them to be a little clunky. Luckily, most of my scans come out just fine without extra work.
Best For Speed (Runner Up): Photomyne App
If buying an extra device is a non-starter for you, an app like Photomyne is a good alternative. It supercharges your phone’s camera by auto-cropping your photos (see below), making it much faster than your iPhone alone. It’s not free ($60/year) and some editing features are behind additional paywalls, but there is a 3-day free trial you can use to test drive it.
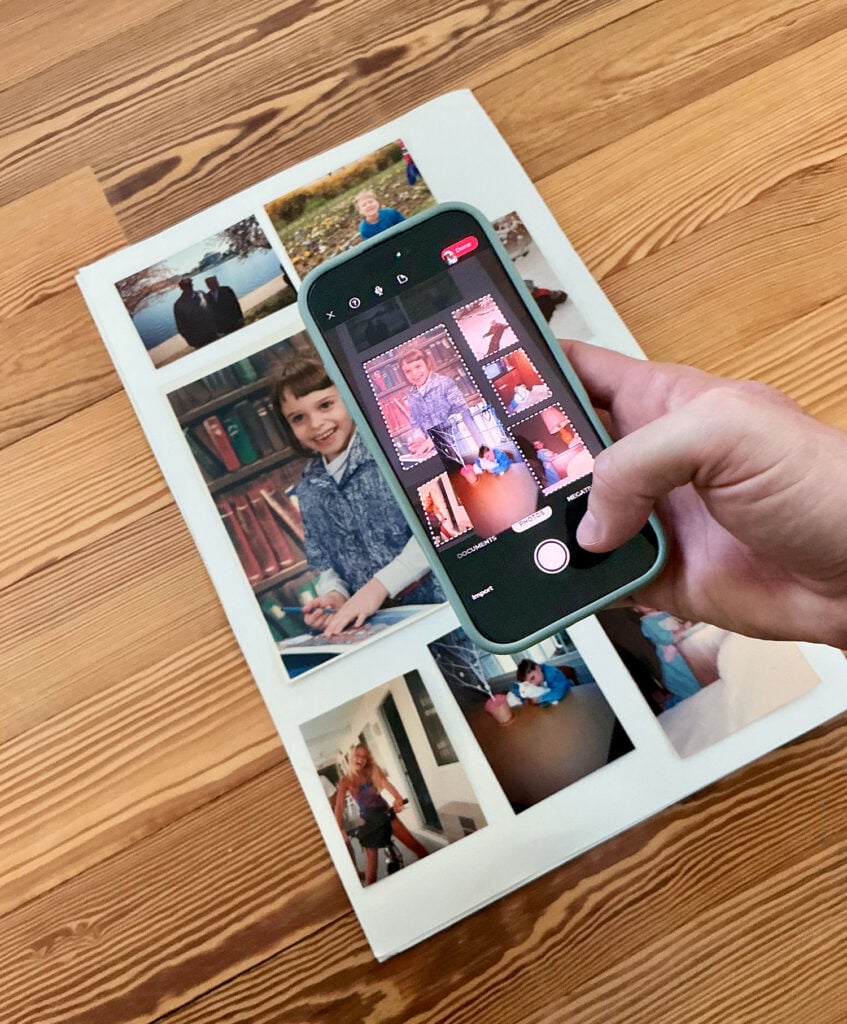
As I noted above with the iPhone Camera, shooting a big group at once can reduce the quality of the individual photographs – but you’ll also lose some of the “magic” the app offers by shooting pictures one-by-one.
I didn’t splurge for any of the paid editing features, but some of the free ones seemed more gimmicky than actually useful. For instance, an AI facial-sharpening tool tended to make everyone look just a little…. off. You can see what it did to teen Sherry below. Note from Sherry: “those are someone else’s teeth in my mouth.”
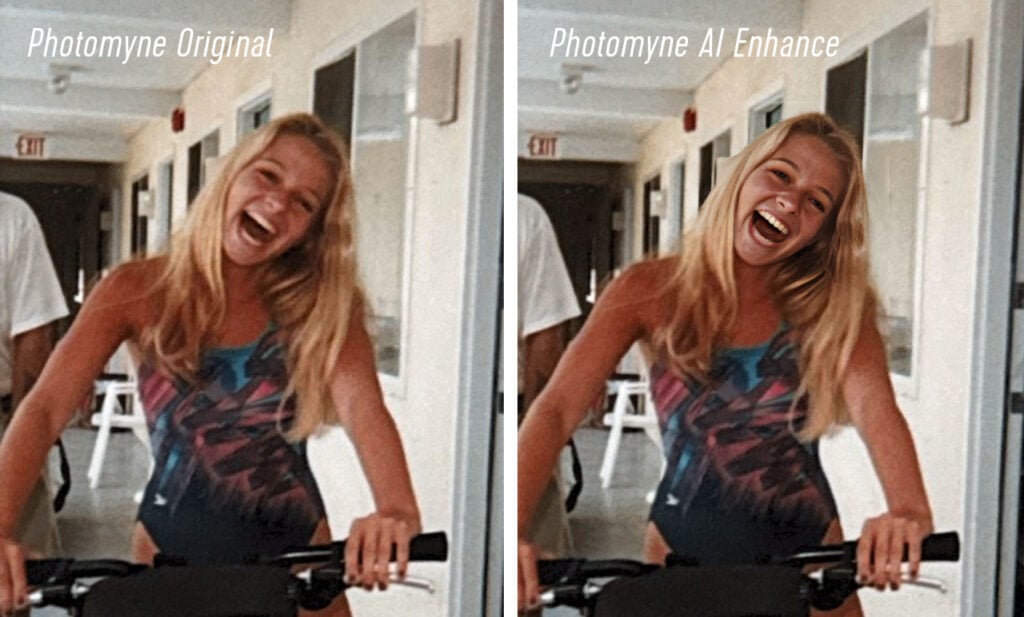
Overall, I thought Photomyne did a good, quick job of scanning – even a smidge faster than the Plustek. But the physical process of arranging & photographing things was more cumbersome and prone to error than simply feeding prints through a scanner. I also felt the quality left something to be desired (a little dull & blurry). So some of the efficiency would be lost in having to edit and adjust them all afterwards.
VERDICT: Second best for speed if you don’t want to purchase a scanner.
An Alternate Photo Scanning App
I chose to test Photomyne because of its ability to scan and crop multiple photographs at once. However, another popular digitizing app is PhotoScan by Google Photos. It only does 1 photo at a time, but uses an interesting technique to eliminate glare – even with the flash on! The app guides you to position a circle over four white dots on your screen, taking a scan at each corner. Then it stitches the multiple captures together seamlessly.
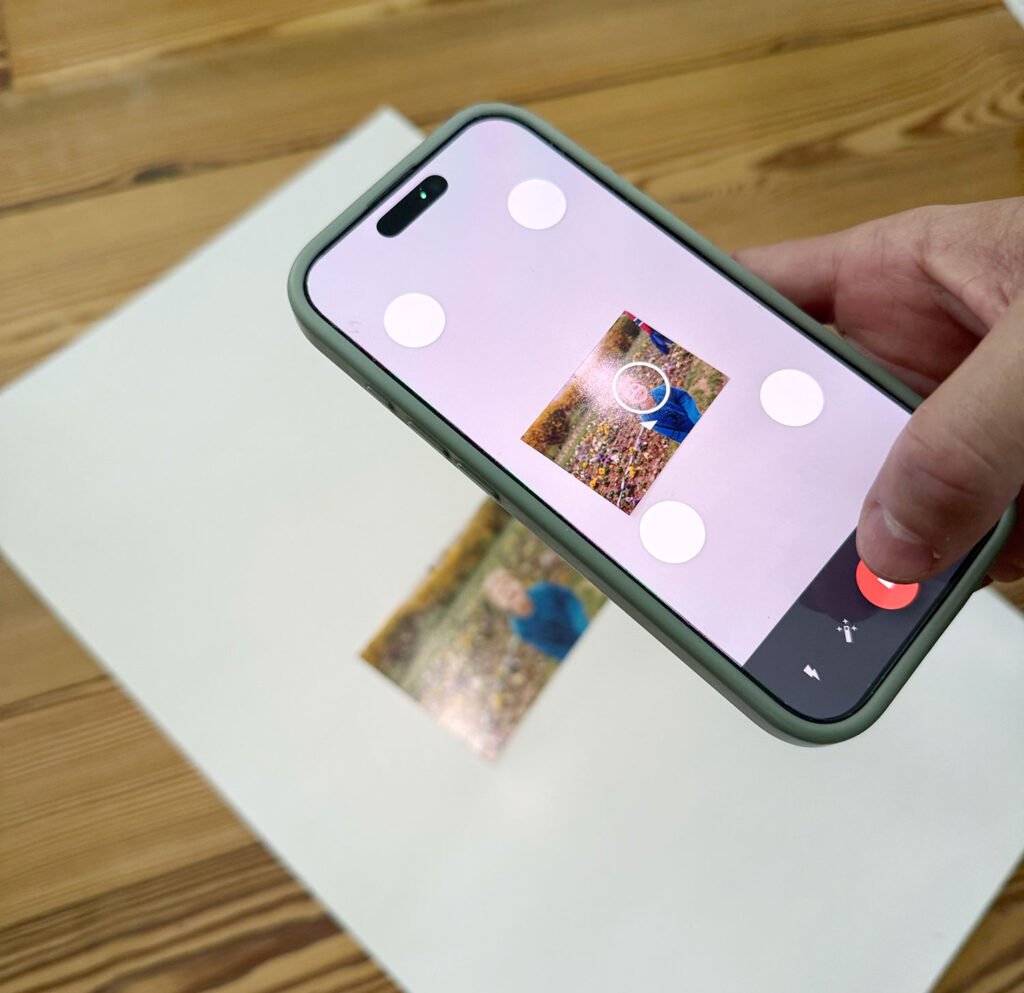
My results were mixed, however. Some attempts were blurry, and others still had glare. Plus, the process of taking multiple photos to get 1 scan was tedious. So I wouldn’t use this for bulk projects like mine. But it is free to use and links directly to a Google Photos account!
Best For Ease: LegacyBox
LegacyBox is a third-party scan-by-mail service that digitizes both photos and videos in a variety of formats (prints, 35mm negatives, slides, DVD, VHS, etc). They ship you a box, you send it back with photos inside, they digitize everything, and then return the originals to you. You can receive your final files via cloud download, thumb drive, or CD. My order is still processing, but it’s hard to imagine an easier, more hands-off process than this!
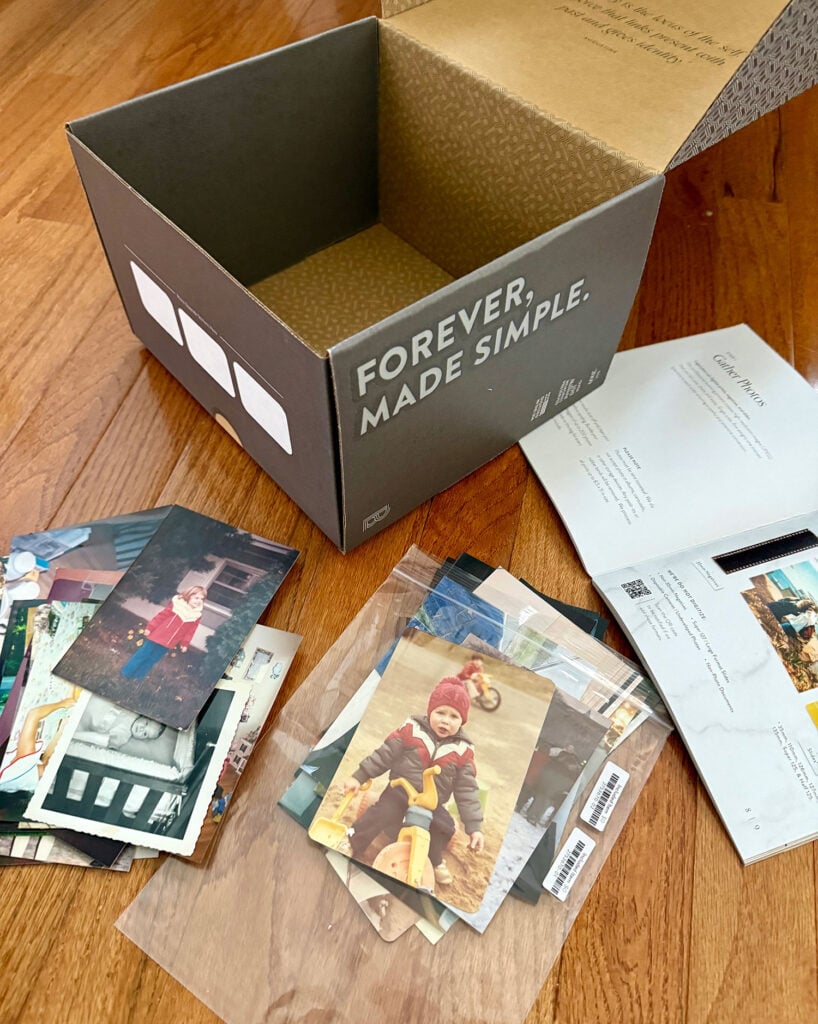
I will update this post once I’ve received my final files, so I can’t speak to quality yet. But I’m pretty certain LegacyBox will lose handily on both cost and speed (it’s expensive and takes a while).
I snagged a holiday discount to digitize 50 photos for $25, but after taxes, fees, shipping & handling, and shipping protection, my total was closer to $55. Sure, there would be economies of scale if I sent a bigger batch, but it quickly becomes the priciest option listed here (500 photos will set you back about $350).
As for speed, LegacyBox says standard processing takes 4-6 weeks, which doesn’t include the time to ship the box back and forth. So while it may not require a lot of your personal time, it’s not a great option if you’re in a hurry. And once you get the digital files, remember you still have to put them into a photobook and get that printed, so they don’t make the entire process hands-off.
VERDICT: Best if you have time and want an easy outsourced option to get the job done – especially if money is no object.
Our Final Verdict: The Best Photo Digitization Method
After all my testing, I’ve digitized hundreds of photos – but still have hundreds more to go. And the method I’ll be continuing with (if it wasn’t already obvious) is… the Plustek ePhoto Scanner!
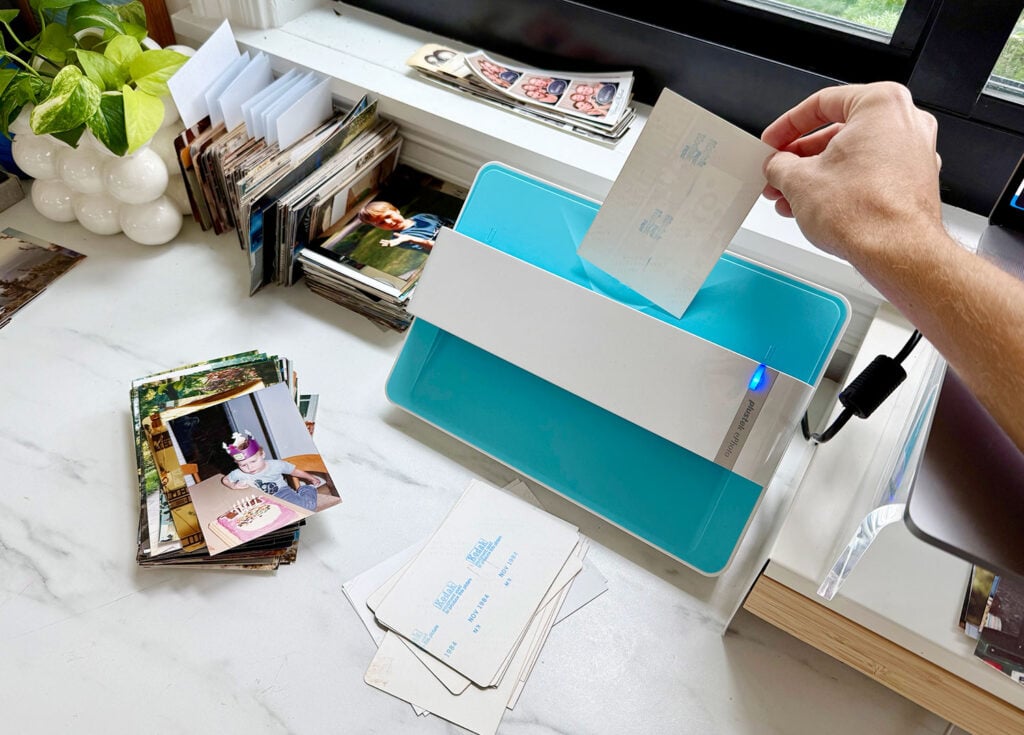
It’s pretty much the ONLY method I can imagine using for such a large collection of photos. There’s no tripod, no shipping, no carefully arranging prints on a white backdrop or scanner pane. The Plustek is easy to set-up, simple to use, and even makes the process somewhat (dare I say?) relaxing. So if you can spare the $200ish to snag this scanner, I think you’ll be very glad that you did. I know we are! And now I know why over 1,000 people recommended it to us when Sherry asked for suggestions on Instagram.
What’s Next For Our Digitization Project?
I’m grateful we’ve landed a digitization method, but there’s still plenty of work ahead! In addition to scanning everything, we want to make sure everything is backed up (locally & on the cloud) and then print several photobooks to replace our bulky albums.
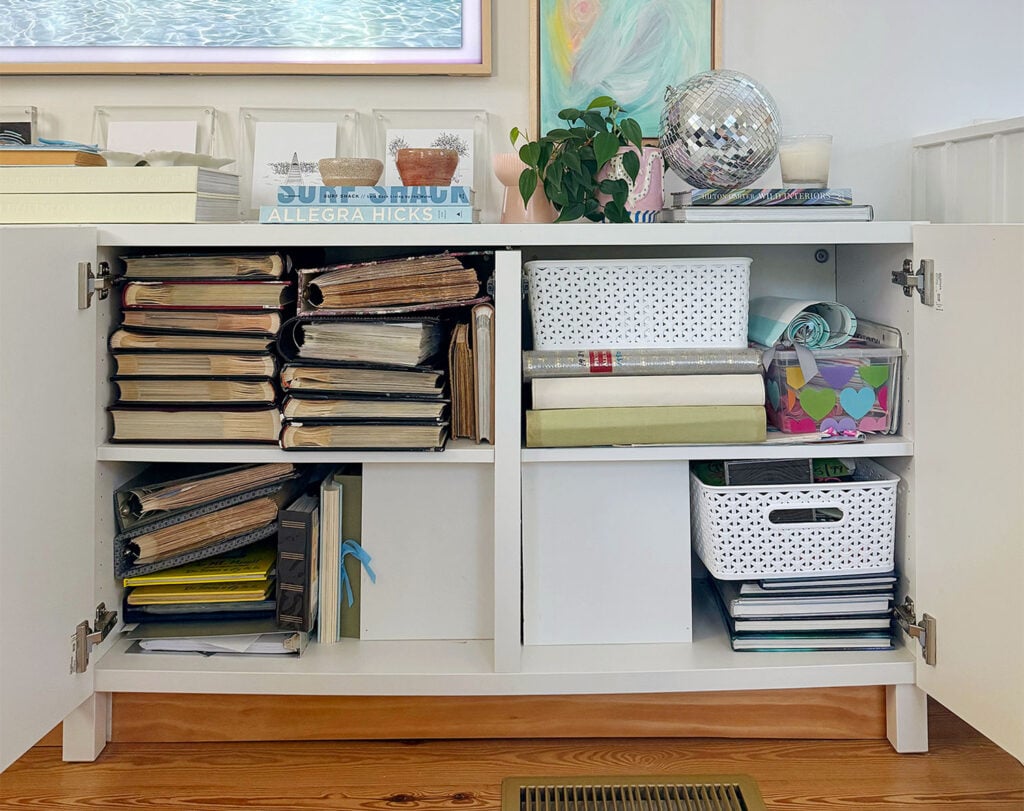
You can see below how photobooks can hold hundreds of photos in a MUCH thinner format than the old puffy albums above. Each of the thin books below holds about 450 photos while the puffy ones above hold about 225. To put it another way: that’s ten years of photos (around 4,500!) below in those much thinner books, and fewer than 5 years of photos (around 1,125) in those puffy albums above, which take up about 4X more space.
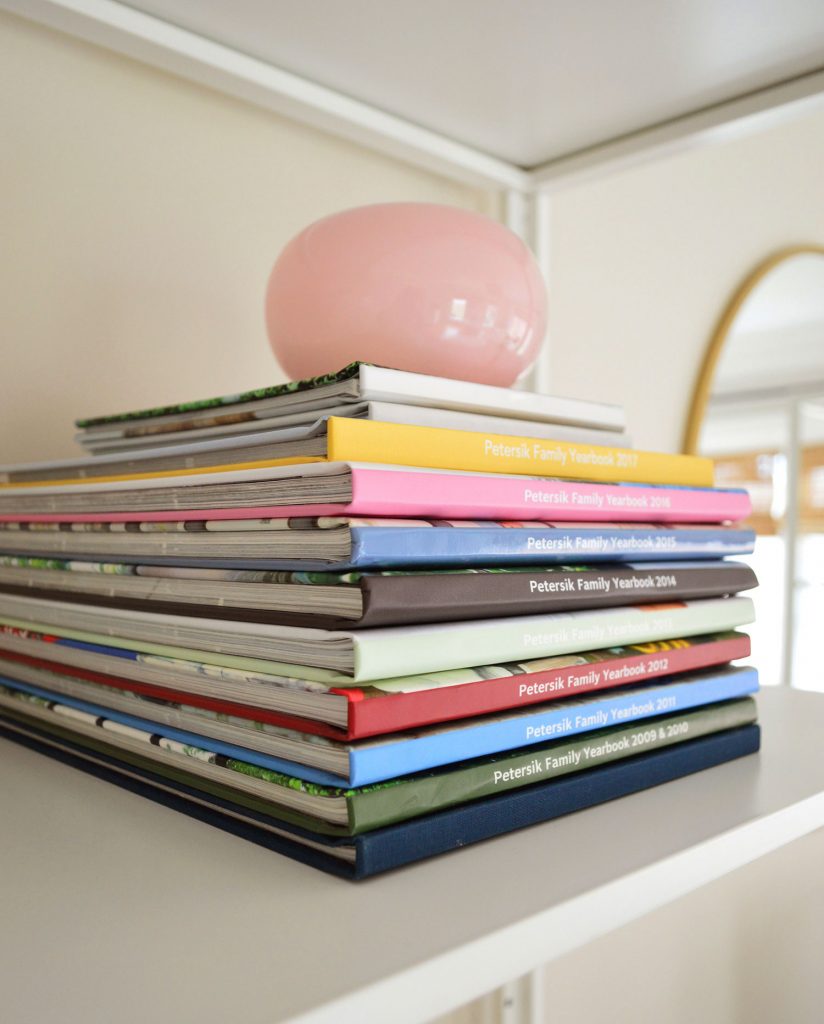
In summary, we’re thrilled to be reclaiming some extra storage space when we finish this project! And we’ll feel a lot more secure once we have all our photos securely stored in multiple places (many of the photos in our old puffy albums exist only there… so if something happened to our house, they’d be lost forever).
Once we’ve finished this entire photo digitizing journey (what is this, The Bachelor?) I plan to write a final post with all of our tips & lessons learned from this undertaking. And I’ll be sure to address what we’re doing with the old photos we are keeping. Don’t worry, we’re not throwing everything away!
*This post contains affiliate links, so we may earn a small commission when you make a purchase through links on our site at no additional cost to you.